
Menus and Features
The Z-Finder EVF packs a ton (907 kg) of features into its tiny box. With the current firmware, version 3.02.04, the list includes:
- Brightness, Contrast, and Chroma: Not only can you adjust brightness, contrast (which affects black level), and saturation, you can tweak R, G, and B levels, and save the levels into one of four presets.
- Blue Only and Monochrome setting let you view just the blue channel or a luma-only signal.
- Color Bars displays a SMPTE-style bar pattern, complete with PLUGE, to aid in calibrating monitor settings.
- Battery Level shows a four-segment battery gauge. If you choose not to show it, it’ll still pop up when only 10% of the battery power is left.
- Scaling: the EVF includes scaling presets to ensure that the active picture area output on your camera’s HDMI port properly fills the EVF’s image frame. There are presets for seven Canon DSLRs, four Nikons, the Panasonic AF100 and GH2, the Sony F3 and FS100/FS700, RED ONE, and Epic/Scarlet. If those aren’t good enough, you can define eight (!) custom presets, so you can choose how much of the HDMI image should be shown, and where to align frame lines to fit the active video in that image (tutorial here). The scaling menu also allows for normal scan, overscan, or three levels of underscan, so you can get the image perfectly sized for your viewing conditions (underscan is only available for “auto” scaling, where the full incoming raster is displayed). The scaling submenu shows the current incoming video format (e.g., “VIDEO FORMAT: 1080i60”), too.
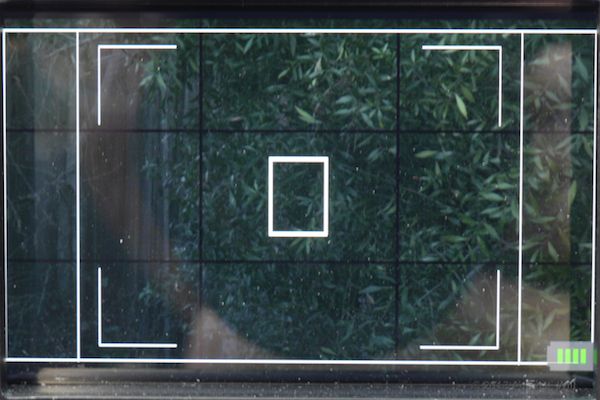
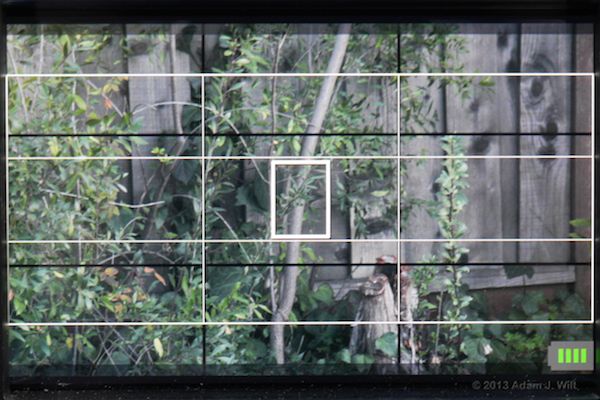
- Frame line: you can choose from 4×3, 15×9, 16×9, 1.85:1, 2.35:1, or 2.66:1 aspect ratios. The video ratios include options for safe-area corner markers and a 4×3 protection marker. The frame can be shown as a single-pixel white line, or as gray box blanking everything outside the frame area. You can also select a center cross, and a 3×3 grid for “rule of thirds” composition or horizon-leveling purposes.
16x9 frame guide with 4x3 and safe-area markers (black grid and white center box are in the Canon's source video).
2.35:1 frame guide with 3x3 grid (black grid and white center box are in the Canon's source video).
- Anamorphic: you can choose from normal, 1.33X, 1.5x, and 2x lateral expansions for use with anamorphic lenses.
- Focus Assist: the EVF has three selectable levels of peaking, and/or a “red-line” focus signal which enhances in-focus areas with short red line segments:

"Red-line" focus assist (EVF is also in pixel-to-pixel zoom mode).
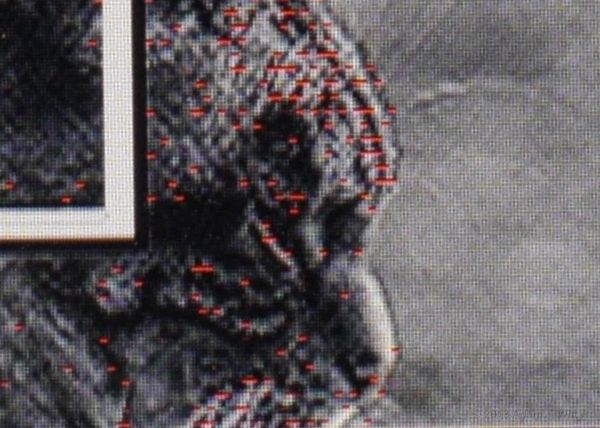
Detail of "red-line" focus assist image.
- Exposure Assist (Zebra) offers two zebra settings, variable all the way from 1% to 109%!
- False Color shows shadow areas in blues; highlights in yellows; overexposure (>1010%) in red; midgrays (around 41%-45%) in green and nominal fleshtones (mid-50%s) in pink
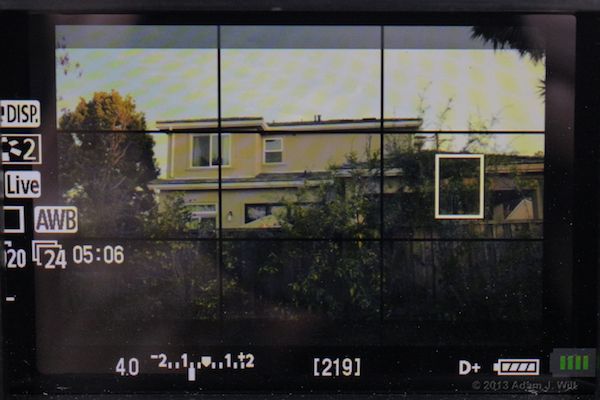
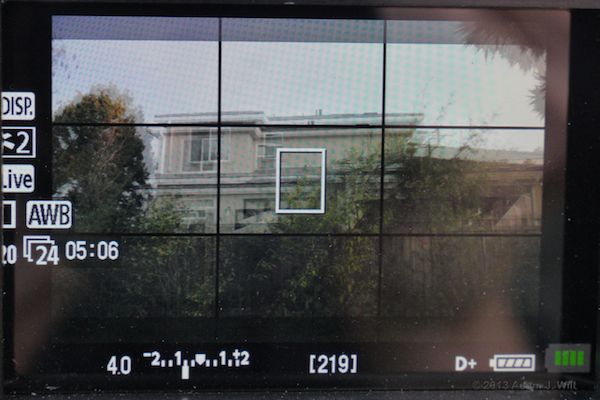
Normal image (using Canon 5D Mk II scaling, but Canon's Info mode isn't set for full-screen pix).
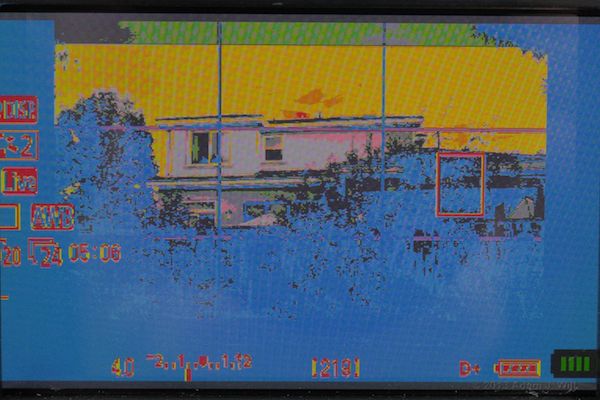
False-color mode.
- Image Flip lets you rotate the image 180 degrees, so you can use the EVF inverted.
- Pixel To Pixel (Zoom) gives you a pixel-for-pixel image for fine focusing. Like most such zooms, it enlarges the center of the image.
- Audio Meters displays an audio bar graph for audio signals incoming over HDMI – a must-have feature for cameras like the Blackmagic Pocket Cinema Camera that do supply audio over HDMI while recording, but don’t give you any decent way to monitor its levels! The meters include a peak-hold indication and a tri-color display, with green at low levels, yellow for hotter sounds, and red at clipping.
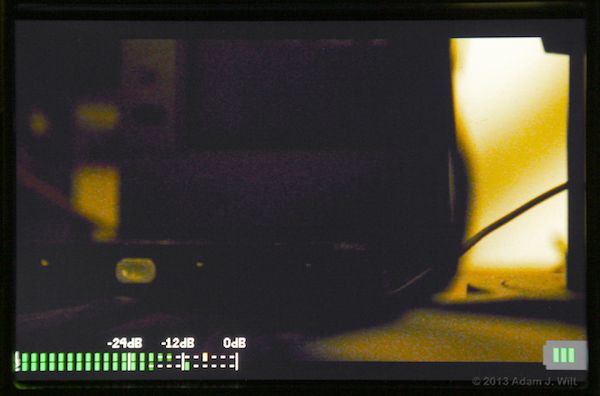
Audio meters on the EVF (signal fed from a Panasonic GH3).
- Miscellaneous: lets you select your HDMI output setting to be Auto, or YUV 422 (this setting isn’t documented. I’d guess that it allows an incoming RGB 444 feed to be transcoded to YUV 422, but that’s just a guess).
- Frame Store: the EVF has seven (!) frame stores internally, into which you can grab frames for later recall. The frames can be overlayed on incoming video so you can use ’em as alignment guides, either to replicate a scene or to ensure that elements from one scene will match another. You can also recall a frame in an opaque (not see-through) manner; in such a case, you’ll probably want to map “show” to a function button so you can toggle it on and off easily.

The Frame Store menu.
Replaying a stored frame over live video; the camera has shifted slightly.
- Feature Location lets you position the battery gauge and the audio meters in any of the four corners of the screen.
- Function Buttons lets you assign any of these functions to any of the the three programmable buttons on the side of the EVF.
- Update is used to load new firmware from a USB drive.
- About shows you the current firmware revision.
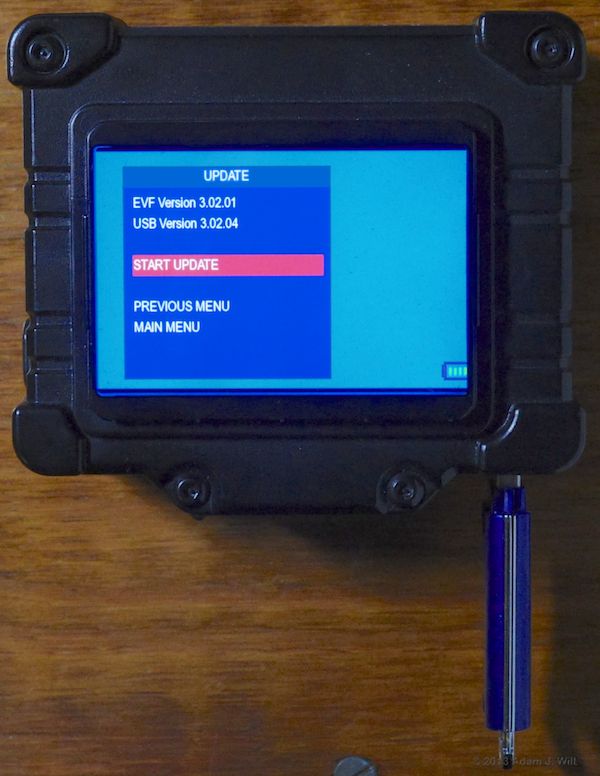
Firmware loads from a USB drive... and it installs quickly, in only a few seconds.
Next: Performance, Uses, Conclusion…