
Since my college days I’ve been driven to learn how other DP’s light: what units they use, where they put them, how they blend them together. Behind-the-scenes photos, while immensely helpful, are rare these days, but I’ve found significant lighting hints in even the most basic closeups… the eyes say it all.
Eyes are shiny and round. I know that’s not exactly a newsflash, but their shape and reflectivity makes them mirrors for everything around them. I’ve spent years studying light placement by looking at eyes in closeups, and if you aren’t doing the same then it’s high time that you started.
Roundness is both a blessing and a curse. On the one hand, the front surface of an eyeball reflects everything in front of it and some of what’s behind it, so there’s a huge amount of information crammed into a very small space. The bad news is that this curvature distorts sizes and distances, so it takes a bit of experience to make sense of the reflections one sees in an eye.
For example:
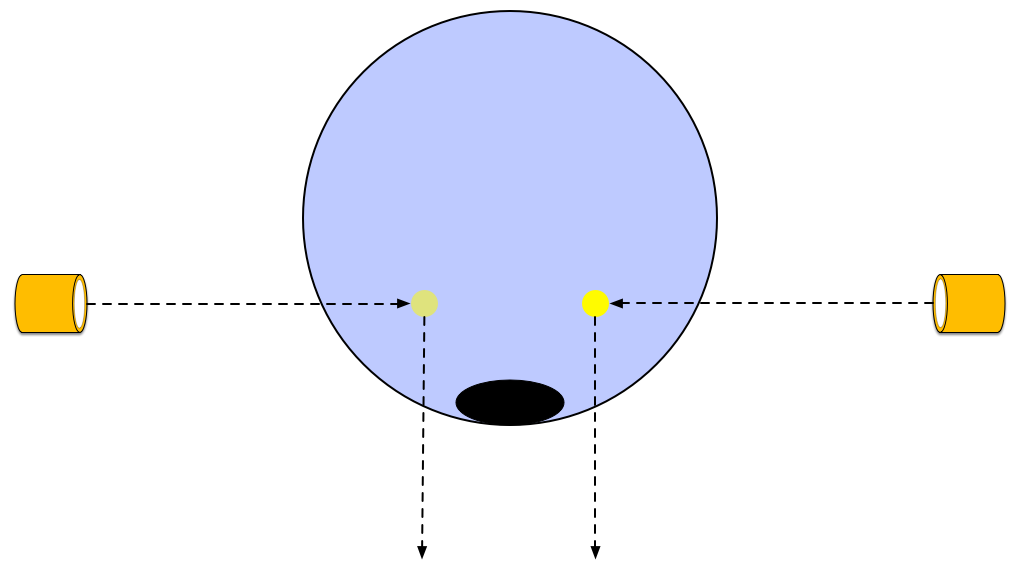
Sidelights are closer than they appear.
Any light striking the side of a face at 90 degrees will show up as a reflection at 45 degrees off the center axis. You’d think highlights from side crosslights would be farther out, toward the edge of the eyeball, but anything farther than 45 degrees from the center of the pupil is actually behind the subject’s head! This means that any light placed in a 180 degree arc in front of a person’s face is going to show up in the eye as a reflection within a 90 degree arc that’s centered on the pupil. Not only that, but large soft sources will appear smaller because convex surfaces just do that.
I’ve done up a series of sketches showing how I interpret various reflection patterns that I see regularly in films and TV. The proportions aren’t perfect–the soft sources I’ve drawn are often larger than they’ll really appear–but you’ll get the idea. Once you’re aware of this technique you can start to compare what you see when you light shots with what you see in projects shot by others, and that’s when the basic size and distance relationships will start to click.
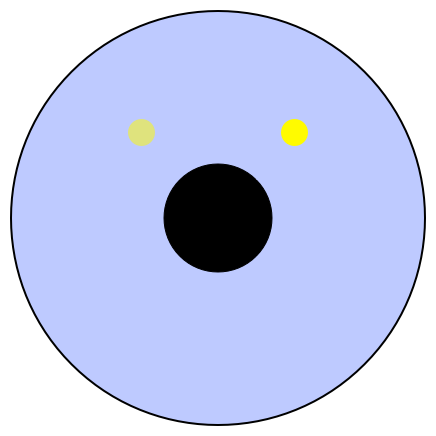
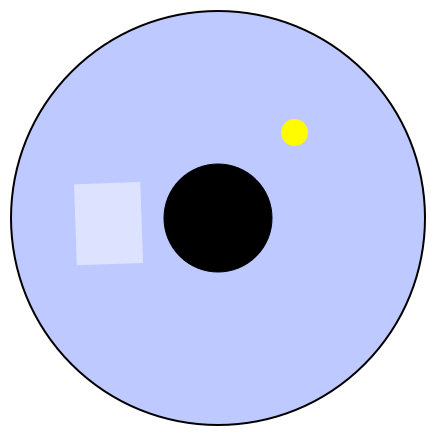
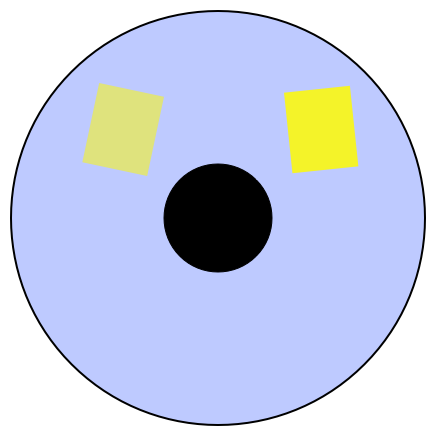
Hard key (right) and hard fill (left). This is the basic “Film School 101” lighting setup that everyone learns and can’t seem to forget.
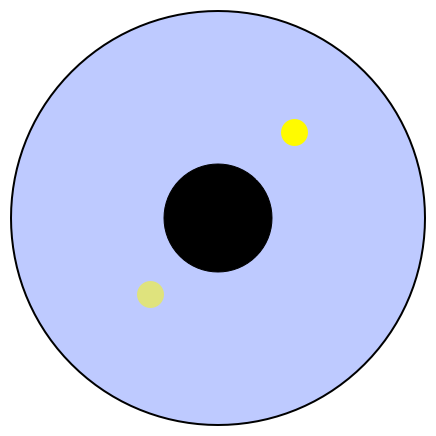
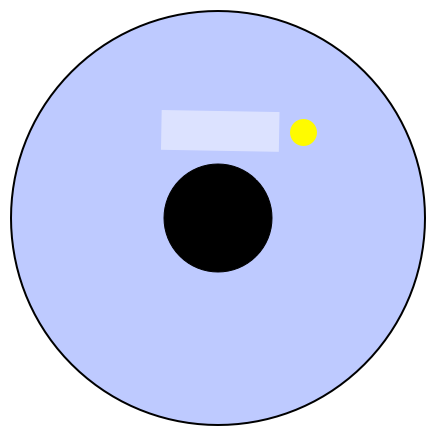
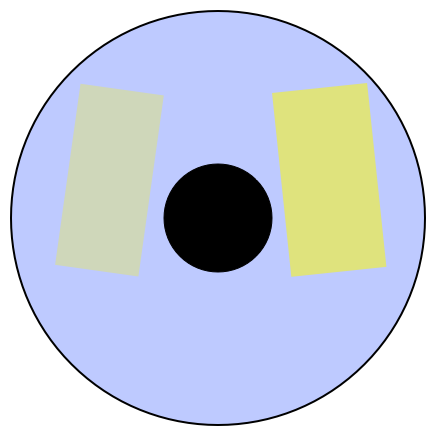
This is a slightly more advanced version of the above. You see this in a lot of early (1930s/1940s) black and white films. The fill is not only opposite the key horizontally but also vertically. The good news is that lights placed below the lens reach into eyes quite well; the bad news is they throw fill shadows upwards onto walls.
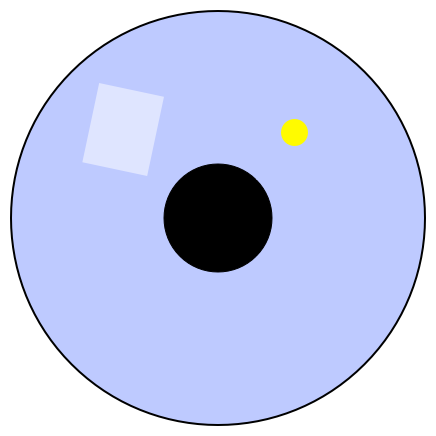
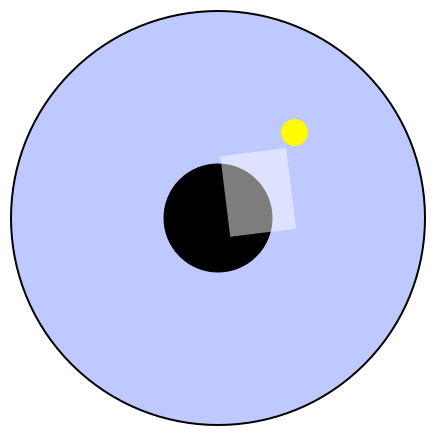
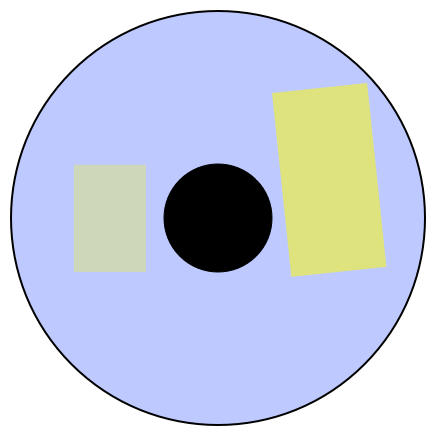
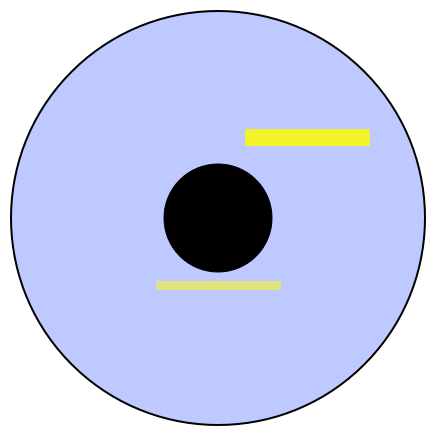
This is a variation on the classic key-fill setup, with a hard key but a soft fill. It’s often hard to tell how big or how close the fill is, but one clue is its brightness: large sources are generally dimmer because the light is spread across a larger area.
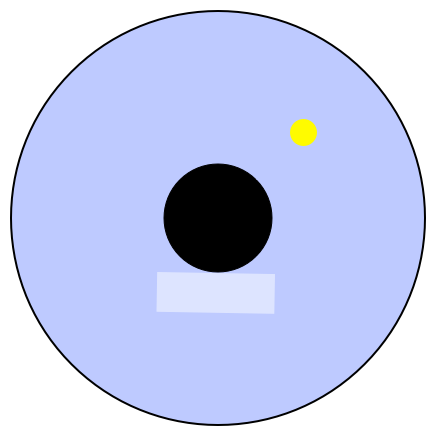
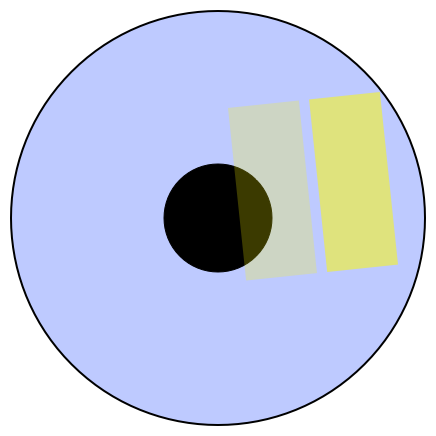
Placing the fill source lower eliminates double chin shadows. Multiple shadows are almost always a bad thing unless they fall in the same direction. This could be a bounce card or a light through thick diffusion.
This is one of my favorite tricks: filling from the key side. The key light shapes the face and the soft fill (usually a light through a large frame of diffusion) gently continues it around, allowing the side opposite the key to drop off. Instead of only two tones (a key side and a fill side) this creates a wide range of tonalities across a face.
Years ago I took a lighting workshop from Vilmos Zsigmond, ASC and he showed how he always filled using a lamp aimed into a 4’x8′ bounce card placed directly behind the camera. This is a significant part of his look: the fill light plays just as important a role in creating a look as the fill light does, and sometimes more.
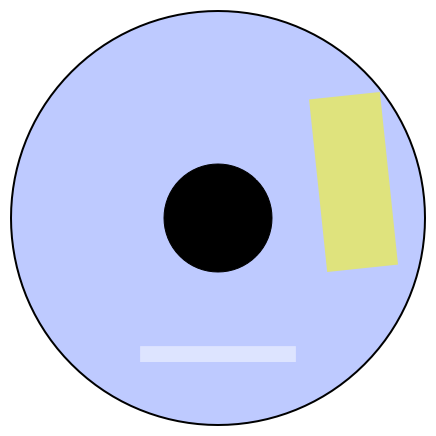
I use this trick a lot. Filling from below the lens creates the sense that light is bouncing off the floor (the way sunlight through a window would) and feels very natural to me. In this case we’re seeing a 4’x8′ bounce card placed below the camera, with a lamp aimed into it.
This is the classic key/fill setup but using large soft sources, usually frames of diffusion. I see this a lot in episodic television: it’s fast and it looks reasonably good. Faces generally respond better to soft keys, although properly placed fill lights can clean up a lot of issues.
I see this a lot in commercials, especially in my own work. These are either HUGE light sources (12’x12′ or 20’x20′) not too far away from the talent, or 4’x4′ frames almost on top of the talent. Not only is the light ridiculously soft and kind to faces but the specular highlights this creates in skin are quite pleasing. This works best with some contrast, though, so the fill light is usually dim or non-existent.
Often I’ll use my largest diffusion frame as the key source as I want it to cast the softest shadows. The fill source can be a bit smaller: even though the smaller source casts slightly harder shadows they’re a lot dimmer, so they usually disappear. (Not always, but usually.)
Sometimes a single large source just washes out a face and doesn’t leave enough contrast from one side to the other. In those cases I’ll often use two sources: a bright one from the side and a dimmer one that extends it around the front of the subject. This creates a much wider range of tonalities than a single large source will.
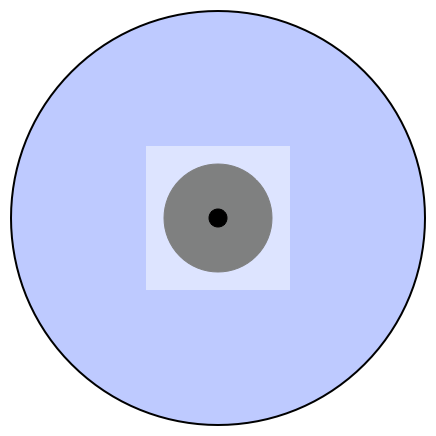
That’s a 4’x4′ Kino Flo as a key light with a single Kino tube rigged under the lens as fill. I don’t do this much myself but I saw it a lot when I worked as a camera assistant.
This is a big soft key (perhaps through a window) with a low bounce fill, probably a 4’x8′ sheet of foam core laid on the floor and lit with a lamp.
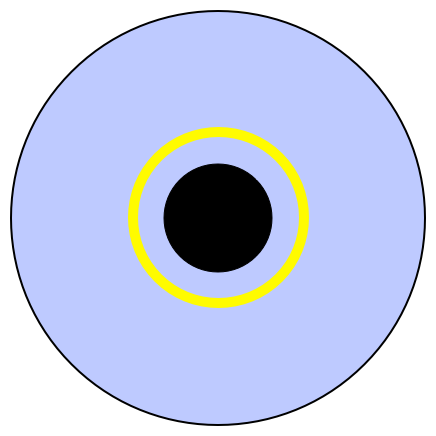
Ring lights have a pretty distinctive look, but that looked can be faked…
…by punching a hole in a 4’x4′ sheet of foam core and putting the lens through it. Lights are bounced off the front of the foam core. The highlight in the eye is different but the quality of light can be very similar, depending on how far the light source is from the subject.
I hope this is enough to get you started. When learning how others light, shiny surfaces are your friend.