GL2 Watchdog
|
|
> top of page < |


Title Mix Function - An Undocumented GL2 Feature
by Tustin Larson, February 2003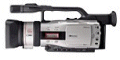
The Title Mix function, an undocumented GL2/XM2 feature, allows you to create an instant 16x9 black letterbox matte right in the camera, or insert your company logo as a small "bug" in a corner of the video image, or show a lower-third title graphic over moving video... instantly, while you shoot, no rendering or post-production required. Other less expensive consumer-grade Canon camcorders have this ability clearly documented in their feature sets; Canon seems to have left it out of the GL2, a strange oversight. The simple work-around presented below unlocks this very useful feature, making it available in the GL2, as it should have been in the first place.
In addition to the following text-based article, there are also two video tutorials of this process currently available for download, as either a Windows Media version or a QuickTime version. The WMV download size is 17 megabytes; the QuickTime version is split into two parts (QT part one at 17 megabytes and QT part two at 21 megabytes). You should save these files to your local drive first, then play them from your computer; this will allow you to keep a copy on hand for your own reference later. Enjoy! If you need to more information about anything within the tutorial, we have established this discussion thread about it on our DV Info Net Community message boards.
Part 1 - Creating the Overlay Graphic
Open Photoshop, Paint Shop Pro or any other graphics program that you may have. Create a new image with these settings:
- Width: 640 pixels
- Height: 480 pixels
- Resolution: 72 d.p.i. is all you need for DV
- Mode: RGB Color
- Background: White is fine
Now create your graphic. It can be a title, a logo, a lower-third, a corner bug... anything you want; any color you want.
Now here's something that's very important: the GL2/XM2 card mix function uses luma keying, so it will see any BLACK (R-0 G-0 B-0) as a place you want to key out. If you want to use Black (drop shadow, stroke, text color,) make sure that the RGB settings are (R-12 G-12 B-12).
Once you've created your graphic, its time to make a new layer. Select that layer and drop it all the way to the bottom of all your graphics layers this will act as your background layer. With the new layer still highlighted, select the paint bucket tool. Select the color BLACK (R-0 G-0 B-0) and click on the new layer, turning it BLACK.
That's all you have to do. There's no Flattening, no Alpha Channel required.
Part 2 - Saving the File
There is a specific way you must save this file so that the camera can read it. It's so important that has its own section about it.
Now that the new file is done, click File > Save As This will bring up a saving dialog box. Save it to any location that you want, as long as you can remember where you put it.
You must save it with this filename: USR00001
If this is your first one, then it's 00001, and in succession after that it's 00002, 00003, 00004 and so on. The file must be saved as .JPG. So click on the "save as" dropdown box, and select .JPG.
Part 3 - Putting it on the card
If you have made it this far, then you've succeeded in creating the title file, and saving it properly. If you have not done the first two parts of this tutorial, it won't work right. Stop here, and go back over the previous sections.
Connect the GL2 to your computer with the USB (not FireWire) cable. Turn on the GL2 and set it to VCR/VTR mode and switch it from TAPE to CARD. You should now be able to access the contents of your MMC/SD card from the computer. Open the TITLE folder. This is where the file needs to be placed. So now open another window and navigate to the location where you saved your .jpg file. Click and drag it into the TITLE folder... it's now on the card.
Part 4 - Accessing the Title Mix
Last step we're almost there!
Unplug the USB cable, power the GL2 back to CAMERA mode and switch it to the TAPE function. Push the MENU Button. Use the dial to select TITLE MIX. Now select TITLE SELECT. (you can read about the create title function in the manual). When clickiing TITLE SELECT, it will access the card and you will see a gray screen with a thumbnail of your graphic. Use the dial to select it. It will jump back to the MENU. Click RETURN and RETURN again. Now you should be out of the MENU. If not, then just push the MENU button and you will be out of it.
Now you are saying to yourself, "Hey, I did all this work, and nothing happened!" Well, there's still one final step left: we just have to activate it now.
Open the cover on the top handle of the camera. Look for the button labeled MIX/SLIDE SHOW. Push that button. It works! Now you can pat yourself on the back you have learned the TITLE MIX FUNCTION, a very cool undocumented GL2/XM2 feature.
Back to the Canon GL2 Articles Menu
Written by Tustin Larson
Thrown together by Chris Hurd
Please direct questions to the DV Info Net Community Forums.
Where to Buy: These dealers are authorized DV Info Net sponsors... | |||
|
|
|
|
|
|
|
|
Please support this site by making your purchases through them. Thanks! | |||
©1998-2008 DV Info Net
The Digital Video Information Network
San Marcos, Texas
A boy without mischief is like a bowling ball without a liquid center.