
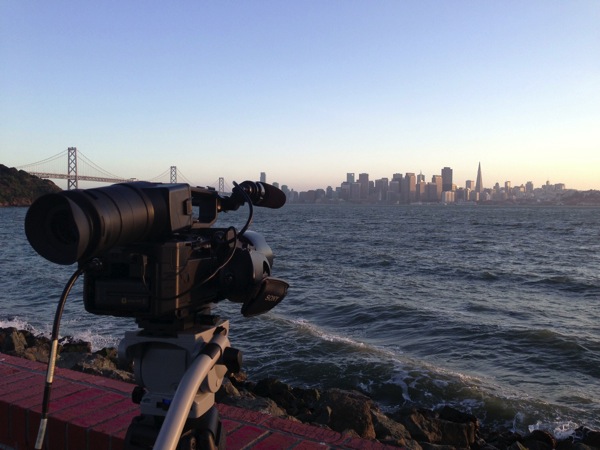
Adam Wilt and I have had a 4K-enabled Sony FS700 to play with for a week. Come see what we’ve discovered about the latest entry into the 4K race to high resolution history…
 The FS700 has a lot in common with this camera — the Bell & Howell 2709 hand-cranked silent film camera (pictured right). It is 90 years old and it still works.
I’m not saying that the FS700 is old or obsolete or can’t record sound; rather, I’m saying that, like the FS700, it’s possible to make beautiful images with the 2709 if you know what you’re doing.
The reason for this is simple: neither camera allows you to really see what you’re doing while you’re shooting yet both cameras can yield great images. The trick is to know the procedures necessary to ensure usable images and to follow them religiously. There’s a list of 28 things that you’re supposed to do to the 2709 before EACH TAKE to ensure great results, and while the FS700 doesn’t require all that it does require similar attention to detail and procedure to ensure consistent results.
For example, you can’t see through the lens of the 2709 while shooting. You can see through the lens of the FS700, using either the on board LCD monitor or an external HDMI display, but you still won’t see everything that you’re getting. It takes more than simply looking at a monitor to make pretty pictures with this camera, and while that’s a challenge for some it’s an opportunity for others who can only afford an inexpensive 4K camera and will find ways to make it work for them.
Viewing
The FS700’s LCD display can’t show you what the camera is really seeing. The LCD is very low resolution and the processing in the camera isn’t quite good enough to show you what you’re really getting even in pixel-for-pixel magnification. This makes life a little more difficult when you learn that the FS700 is one of the sharpest 4K cameras around.
When Adam Wilt and I shot some tests recently with the FS700 we were only able to monitor our images using an HDMI output, which is not ideal for a number of reasons, not the least of which was that the image is -only- HD. Standard 1920×1080 is ¼ the resolution of what the camera sees, so even with a large monitor there’s no way to see everything the camera can until you get the footage into post. Unlike the 2709 you can see the actual frame, but you won’t see everything the camera saw until much later.
This is where we, like the silent film camerapeople of old, have to simply “eyeball” it. Rather than trust everything we see through the viewfinder we have to step back from the LCD and actually look at the physical space contained within the frame and see if there’s anything present that we don’t like. This great practice in general: when shooting commercials I’ll often walk around the set before a take and see if there’s something present that I didn’t notice through the viewfinder. If I walk toward the back of the set and see a cable on the ground I know to look for it through the lens and see if it’s visible in the shot. In the case of the FS700 you still may not be able to see it, but if you can see it by eye the camera will certainly see it.
The LCD and external monitors become framing references only. They won’t show you what the camera sees. Only your eyes can do that. And in many cases the camera will see more than you do.
Framing
If you’re shooting in 2K or 4K the aspect ratio is actually 1.89:1, not 1.77:1. This is normal for these non-HD formats, but most cameras give you some indication as to where 1.77:1 ends and 1.89:1 begins. The FS700 does not offer the user variable frame markings.
The full 1.89:1 frame, as seen in Sony Raw Viewer.

The 1.77:1 (16:9) frame guides in Sony Raw Viewer. You won’t see these in the camera, so you’ll have to intuit where to place things in the frame.
It’s not terribly hard to learn to visualize where that boundary is, and indeed it’s good practice to not put anything terribly important too near the edges of the frame simply because one never knows exactly what kind of TV the material will play on, or how accurate the projector crop is in a movie theater.
Focus

One of these images is sharp in 4K, and one isn’t. Which is which? You’ll never be able to tell from these images, and yet these are better than what I saw in the camera’s on-board LCD monitor when I shot them.


I focused the top image while stopped down at f/11, and couldn’t get the building in focus because the resolution of the LCD screen at pixel-for-pixel still wasn’t sharp enough to see when the 4K image snapped into focus. I shot the lower image at f/11 but focused at f/2.8 and ended up with much better results.
This is the tricky bit: the FS700 makes gorgeous 4K images but odds are most FS700 users will employ still lenses instead of cinema lenses due to cost. Still lenses are plenty sharp but they are very difficult to use as they are designed to be focused primarily by an autofocus mechanism. Still lens barrels tend not to be very large in diameter and distance markings tend to clump together, and the markings aren’t completely accurate anyway because still photographers focus by eye and not by focus scale. The distance between markings close to infinity is so short that breathing heavily on the lens can shift focus from 20’ to infinity and beyond.
Due to limitations in the viewing system it is extremely important to follow a number of steps to ensure sharp images:
- When using still lenses do not zoom in to focus and then zoom back out to your frame. Still lenses are not designed to hold perfect focus across the length of the zoom. Find your frame and then use pixel-for-pixel magnification to set focus.
- Always focus at the widest aperture possible. This will take some extra time as one must typically dial in a lot of ND and then open the aperture using the FS700’s electronic lens interface but this is really the only way to ensure sharp focus. The resolution in the LCD is so poor compared to what the imager actually sees that the difference between in focus and out of focus can’t be seen when the lens is stopped down. Only when the aperture is wide open and focus tolerances are exaggerated can sharp focus be ensured.
- Try to work within the sweet spot of lens sharpness. Most lenses look sharpest between 2-3 stops closed from the maximum aperture, and diffraction starts to impact the super 35mm-sized sensor between f/8 and f/11. As tempting as it may be to shoot at the smallest f-stop possible for maximum depth of field you may be softening the image considerably due to diffraction limits.
- Don’t play splits. Assume that there’s one point of focus, because–in 4K–there probably is. It’s nearly impossible to see what’s in focus using the FS700’s monitoring capabilities, and it’s impossible to see in the field exactly what the limits of your depth of field are. Depth of field calculators aren’t much help as still lens focal length markings are not terribly accurate and the distance markings are suggestions at best. Focus on the most important thing in the image, stop down as far as you can before diffraction sets in, and you’ll be in good shape.
Rolling Shutter
Over the course of our tests I learned something very interesting from Adam: shutter speed affects the exposure of each individual photosite but does not affect the speed at which the sensor is “read out” from top to bottom. Decreasing exposure time doesn’t necessarily eliminate rolling shutter artifacts because jello-cam effects result from the read out time, not from shutter speed.
Rolling shutter artifacts can be invisible in the field. The two situations where I’ve seen rollling shutter artifacts reliable are shooting from cars and shooting in high winds. Vertical vibrations from car movement can cause the image to appear to expand and contract vertically, as can buffeting from wind that catches the lens and/or camera body and jiggles it up and down. When possible minimize vertical vibration to reduce or eliminate jello-cam.
Stabilization
One great use for 4K is to create perfectly stable HD images by using the extra frame area to compensate for image shake. Post-processing tools like Blackmagic DaVinci Resolve have built-in stabilizing tools that work really well, but the one thing they can’t do is remove motion blur. If an image has a lot of shake and motion blur, the shaking can be eliminated but the motion blur will remain. It’s a bit odd to see motion blur in a stable image. This is one case where an aggressively short shutter speed can help considerably.
Exposure
I’ll go into this at length in another article, but the biggest advantage to shooting 4K with an FS700 is capturing 12-bit linear raw files. “Raw” simply means that the actual sensor data is being stored before the debarring process is applied. This has a number of advantages, two of which are:
- Debayering takes a lot of processing power, and it’s always better to do that later using a powerful CPU than it is to do it very quickly in the field in the camera.
- Debayering technologies are always improving, so it’s possible to revisit footage in the future and render better images using advanced technology.
Some raw formats are log-encoded as linear gamma is highly inefficient. Linear gamma uses 50% of the available brightness levels to record the brightest stop of highlight information, and subsequent stops are recorded in fewer and fewer steps right down to the darkest shadow. Log encoding captures every stop of brightness in perceptually equal steps, which is much more efficient for storage as the brightest highlights no longer take up 50% of the available storage space per frame. But… pure log encoding is also lossy, and the beauty of raw is that it is the least lossy format possible.
Sony’s raw is linear encoded, so while it’s highly inefficient from a storage perspective it also offers the greatest opportunity of preserving detail in highlights. The trick is that, at the time of this writing, the camera will only show you raw data in camera with an S-Log2 gamma curve imposed on it. Log curves are not meant to be viewed directly as they don’t conform the Rec 709 standards, and as most monitors are designed to show a reasonable rendition of Rec 709 material log-encoded footage looks flat and bright.
In other cameras I’ve found that using a built-in Rec 709 LUT allows me to see a “real” image while knowing that I’ve got way more than what I can see being laid down in raw or log format. For all the tests Adam and I shot recently, however, we viewed the image in S-Log2, which made it look very flat and washed out but also allowed us to push the exposures to the right of the histogram and see exactly what we were getting.
Generally it’s a bad idea to expose log footage to the right of the histogram because the nature of log formats is that they compress highlight detail, much the way our eyes do, to save space. Exposing to the right can push crucial detail into the highly compressed upper portion of the log curve. In the case of the FS700, though, you’re looking at raw data that has a log viewing LUT imposed on it, so exposing to the right is okay as the deck is still capturing raw without the log gamma encoding.
In our tests Adam and I consistently exposed to the right, or at least exposed the image so that it looked as normal as possible on the camera’s LCD monitor. When we looked at the material in post with a Rec 709 LUT imposed it was overexposed by about three stops because the middle gray point in log curves is often placed much lower on the brightness scale than in Rec 709-compliant curves, so exposing the image to look “normal” while viewing in log often meant “overexposing” it. As long as no highlights were clipped this wasn’t a problem, and overexposing footage in this manner means pushing the noise floor farther down when the footage is corrected, resulting in very clean images.
The only way to expose “properly” with this camera, where middle gray values would be placed close to where Sony expects those values to fall in raw, would be to view the image through a Rec 709 LUT in camera–but you’d automatically lose track of where the highlights fell because raw can capture much more highlight information than a Rec 709 gamma LUT can display.
One workaround is to set up a picture profile with a Rec 709 curve that is used for setting exposure before switching over to another picture profile set up for log encoding. The log image will look dark but gives one a good idea as to whether highlights are clipping or not. This technique requires a little extra setup time per shot but can result in more accurate dailies than exposing to the right, where exposure can shift from shot to shot within a scene depending on the variations in highlight intensity.
None of this is meant to discourage you from using the FS700. For its price it is an amazing camera, but building such complexity into an inexpensive camera means that you have to make up for the price difference yourself. For decades cinematographers made amazing images with the Bell & Howell 2709 and they had considerably less image information than you will with the FS700. The only question is…
Are You Good Enough?
Being good enough to make this camera work isn’t an innate talent. It can be learned, and indeed these skills must be learned in order to ensure a burgeoning career in the film industry. There are so many things that can go wrong on the average shoot that it is an imperative that the camera crew be constantly aware of all the variables that contribute to making a shot successful. Missing one step can ruin a shot, or a sequence, or a day’s work, and the FS700 is the kind of tool that can train you to be that good. It’s finicky, and it’s not an ideal tool for every situation, but for the price it can’t currently be beat as a tool for 4K image capture. If you know enough, and practice enough, you can become the variable that overcomes all the others.
I recently worked with a Bell & Howell 2709 that was 90 years old and in perfect working condition. I doubt we’ll be able to say the same about the FS700 over the same period of time. What counts, though, is that it is possible that the images you make with the FS700 may last that long. Bell & Howell 2709 cameras shot the epic Ben Hur in 1925! It’s the images that everyone will remember, not the machinery used to make them.
Adam Wilt and I will be presenting a 90 minute talk about shooting 4K on the FS700 this week at CineGear in Los Angeles. If you’re attending, please stop by the Sherry Lansing Theater at 2:15 on Saturday, June 1st.
About the Author

Director of photography Art Adams knew he wanted to look through cameras for a living at the age of 12. After spending his teenage years shooting short films on 8mm film he ventured to Los Angeles where he earned a degree in film production and then worked on feature films, TV series, commercials and music videos as a camera assistant, operator, and DP.
Art now lives in his native San Francisco Bay Area where he shoots commercials, visual effects, virals, web banners, mobile, interactive and special venue projects. He is a regular consultant to, and trainer for, DSC Labs, and has periodically consulted for Sony, Arri, Element Labs, PRG, Aastro and Cineo Lighting. His writing has appeared in HD Video Pro, American Cinematographer, Australian Cinematographer, Camera Operator Magazine and ProVideo Coalition. He is a current member of SMPTE and the International Cinematographers Guild, and a past active member of the SOC.
Art Adams
Director of Photography
www.artadamsdp.com
Twitter: @artadams