
Menus and Operations
[This section describes the menus as delivered in December 2013. In August 2014, Blackmagic corrected many of the issues described via firmware updates, and added more white-balance settings and shutter angles. Details here.]
The two cameras have identical menus, differing only slightly in their activation: items are accessed directly on the touchscreen-driven Cine Cam, and via up/down/left/right arrow keys on the Pocket. The following screenshots are from the Cine Cam and so they show highlighting only in the left column. On the Pocket, the current menu item also has a yellow highlight, as shown in the rear-panel photo earlier in this review.
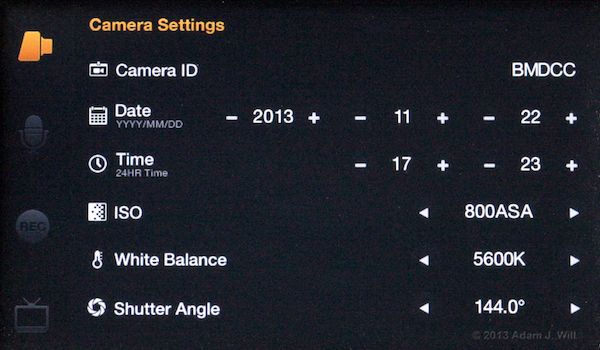
- Camera ID is used for the filename prefix. From experience, I suggest a short ID, like “BMDCC”. If you have a long ID, like “Blackmagic Pocket Cinema Camera”, then your filenames become rather unwieldy.
- Date and Time should be self-explanatory. These are also used in the construction of filenames.
- ISO: the camera can be set to 200, 400, 800, or 1600ASA. The native sensitivity is 800; in “Film” gamma this setting exploits the entire code space from 0% to 100%, without clipping anything. At lower ISOs, the maximum white value is lower: around 80% of full-range at 200ASA, or 90% at 400ASA. At 1600ASA, the top stop of dynamic range will be lost. I’ll use lower ISOs in “Video” gamma, but in Film gamma, all you’re doing is cramming the sensor’s signal into a narrower range of numbers; stuff that clips at 100% at 800ASA clips exactly the same way as 200ASA, only the clip occurs at 80% on the ‘scopes. 1600ASA is useful to “gain-up” dark images for recording, if you don’t mind losing a stop of highlight handling in the process, but I shot film gamma at night at 800ASA and was happy with the results.
- White Balance is settable to 3200, 4500, 5000, 5600, 6500, or 7500K. It’s baked into encoded material (ProRes or DNxHD), and is stored as metadata in raw files where it’s entirely editable in post.
- Shutter Angle can be 45°, 90°, 108°, 144° (flicker-free for 24fps under 60Hz lighting), 172.8° (flicker-free for 24fps with 50Hz lighting), 180°, 216°, 270°, 324°, or 360°.
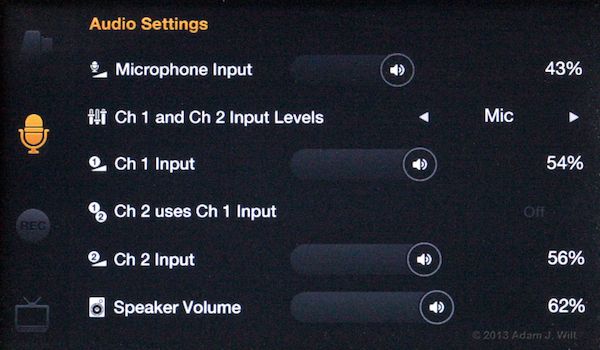
- Microphone Input sets the gain for the built-in mike (Cine Cam) or mikes (Pocket Cine Cam). The built-ins are used unless external audio is connected.
- Ch1 and Ch2 Input Levels can be set for Mic or Line. On the Cine, line is leveled at the +4dBm professional reference; on the Pocket, it’s the -10dBm consumer-level reference.
- Ch1 Input, Ch2 Input: settable from 0%-100%. 0% is off, 1%-100% are on, and the jump from 0% to 1% is profound while the rest of the scale isn’t nearly as wide-ranging.
- Ch2 uses Ch1 Input lets you feed a single mic or line input to both channels.
- Speaker Volume controls the output of the cameras’ built-in speakers during playback, or the headphones at any time.
On the Pocket, the various level and volume controls step by 5s: 0%, 5%, 10%, … 95%, 100%. On the Cine, as shown, the levels are wherever your fat little fingers can drag ’em to.

- Recording Format: Raw, ProRes, or (on the Cine Cam only) DNxHD.
- Dynamic Range: Film, a modified LogC gamma with about 12+ stops of light handling, or Video, a Rec.709-like curve with 9+ stops of usable range. Raw is always recorded with Film gamma, while the encoded formats can use either one. Whichever gamma is selected here is also used for the video on the HD-SDI (Cine) or HDMI (Pocket Cine) outputs.
- Frame Rate: 23.98, 24, 25, 29.97, or 30fps. All progressive, all the time!
- Time Lapse Interval: settable from 2 frames to 10 minutes, with a variety of useful intervals.
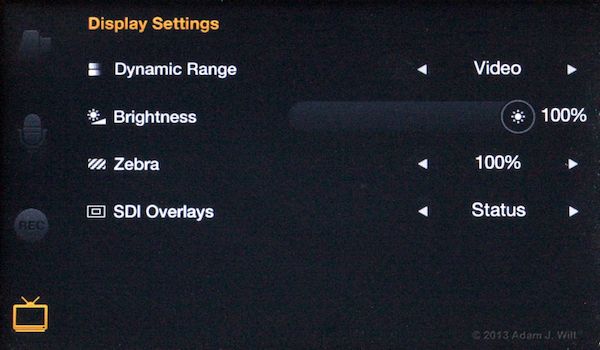
- Dynamic Range: normally this tracks the same setting in the Recording Settings, but you can set it to Video to show a contrastier image on the LCD if you’re recording with Film gamma.
- Brightness adjusts the LCD’s backlighting.
- Zebra is settable in 5% increments from 75% to 100%, or off. In Film gamma, the zebra references the sensor’s level, not the code value for recording: with zebra at 100%, the stuff clipping at 800ASA (showing at 100% on a waveform monitor) will show exactly the same zebra at 200ASA (showing at 80% on the WFM). Bravo, Blackmagic!
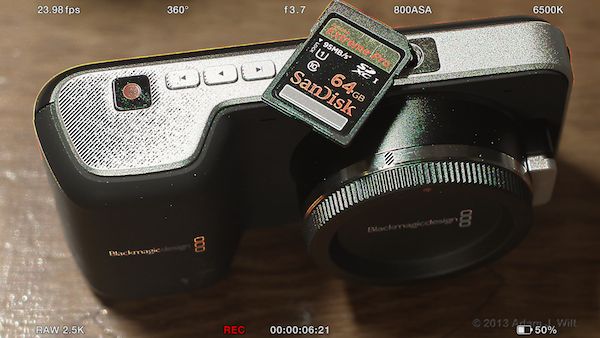
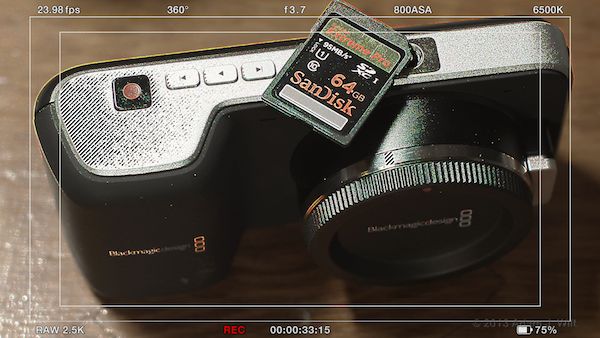
- SDI Overlays (Cine Cam) or HDMI Overlays (Pocket Cine Cam): lets you toggle guide frames and status information on and off:
Off
Status

Guides
All
With “Off” selected, you get a clean 1080p feed from the camera, in the recording gamma. Any other setting (the guides at 80% and 90% safe areas, and/or the status info) also enables display of the peaking signal and the zebras.
These are very handy if you’re feeding an external EVF and using it in place of the back-panel LCDs, but there’s one catch: the Cine Camera won’t output zebras while recording ProRes or DNxHD. Zebras are shown while recording raw, or while stopped, but apparently encoding a compressed image and showing zebras simultaneously are a bit more than the Cine Cam’s brain can handle. The Pocket Cine Cam will always output zebras regardless of format, and both cameras show them on the LCD at all times; it’s just the video out on the Cine Cam while recording compressed that’s the issue.
One display attribute not controlled through the menus is peaking, obtained by tapping or double-tapping the FOCUS button. It’s a fixed-level color enhancement signal, nominally yellow on the Cine Cam (but yellow only in large patches, with delightfully multicolored sparkles on finer details) and reliably green on the Pocket:

Most of the time it’s very useful, but its fixed sensitivity means that in lower-contrast situations it may not appear.
Focus peaking is not remembered across power cycles.
The other display attribute not on the menus is pixel-for-pixel magnification, obtained by double-tapping the screen (Cine Cam) or the OK button (Pocket Cine Cam). Like peaking, it’s not remembered across power cycles. Unlike peaking, there’s no obvious indication onscreen that it’s engaged. The danger here is that you (or your assistant) may turn it on for focusing, and forget to turn it off again, and you’ll blithely frame up and record footage without realizing that What You See is only a small and central part of What You Get. The only way to know is to try toggling it, and seeing if the image zooms in or zooms out.
When pixel-for-pixel mode is not engaged, the LCDs will resolve about 450 TVl/ph. As with many such screens, you set focus by looking for display aliasing on fine details, rather than on the details themselves!
And that’s all there is. There ain’t no more.
If you’re looking for knee point, knee slope, sharpness, matrix selection, AWB, ABB, tint, saturation, highlight saturation, coring, H/V balance, six-way matrix math, shadow gamma, black level, clear scan, lens compensation, and how-you-like-your-coffee settings, you won’t find ’em. If you need ’em, these aren’t the cameras you’re looking for; go getcherself a nice Sony or Panasonic or Ikegami, plug in your CCU, and go to town with painting and shading.
If you’re looking instead for an almost film-like straightforwardness and simplicity, these may very well be the cameras you’re looking for: set shutter angle, fps, ISO, and color temperature, and you’re done with the look. Set recording format and gamma, and you’re done with the encoding. Set zebra and peaking, display gamma, and video-out overlays, and you’re done with monitoring. Focus, set your iris, and press REC: you are making pictures.
But that ain’t all there ain’t no more of. There’s more stuff you ain’t got that you might want:
- ND filters: none. You’ll need to add ’em externally. And you will want them, otherwise you’ll be shooting all your exteriors at f/22 and suffering sharpness-killing diffraction losses.
- Audio level indicators: none originally . You might want to add an external monitor or EVF with levels displayed from the embedded audio in the SDI or HDMI stream.
- Exposure aids other than zebra: none, originally. No histogram [histogram added in firmware version 1.9.3, August 2014], no waveform, no parade, no RED-style goalposts or traffic lights, no false-color modes. You can hook the Cine Cam up with Thunderbolt and use Blackmagic’s UltraScope software on a Mac or PC (and UltraScope also gives you audio levels), or you can use an external monitor with those features.
- No time-remaining indicator on the display [time-remaining indicator added in firmware version 1.9.3, August 2014], except that when you’re down to about two and half minutes or so of remaining capacity, the “REC” indication will start alternating with “SSD Full” or “Card Full”. When it stops alternating, you’re done. You just have to keep an eye on it, and have a fresh SSD (Cine Cam) or SD card (Pocket Cine Cam) at the ready.
- No storage management to speak of. The cameras won’t format media or erase existing clips. They don’t give you a list of clips shot, and will only play back clips in the current recording format – clips shot in raw are invisible to you if the camera is set for ProRes, and vice versa. This can easily lead to cases where the camera won’t show you any clips on the storage, yet the storage has no room left for recording. Unless you’re very disciplined and using a film-style workflow (yes, with camera logs written out and attached to your exposed media, and your exposed media labeled as such and set carefully aside), you’ll want to bring your data-wrangling station along with you, so that you can review footage regardless of format, delete unwanted shots, and reformat your media.
There’s no black balance or black calibration, and none required according to Blackmagic. Both these camera use Peltier coolers on their sensors to maintain an exact temperature, so black calibration should not change (the Arri Alexa is similarly equipped; it also does not offer a black calibration function).
There’s also no pixel-masking function: if your camera develops a hot or dead pixel, you’re stuck with it. Blackmagic suggests you use the dirt-removal function in Resolve, but that’s cold comfort if you’re not planning a transcoding/grading pass in Resolve. Neither of my review cameras showed any noticeable hot or dead pixels (though, pixel-peeping, I could see where some had been masked at the factory). I have no information on how likely these cameras are to develop pixel defects in the field.
Recording
The Cine Cam uses off-the-shelf 2.5″ SSDs. Blackmagic maintains a list of SSDs approved for use. The review camera came with two Kingston 120GB SSDNow units, and two Intel 240GB 520 Series SSDs. All the SSDs worked fine for compressed ProRes and DNxHD, but the Kingstons dropped frames after recording raw for a few seconds. When dropped frames occur, the red REC status starts flashing on and off, but the camera keeps right on recording; it’s easy to miss that a problem has occurred. Clips with dropped frames appear in Resolve as a collection of shorter clips, with the audio in a separate file; the whole mess isn’t very useful. I’d prefer it if the camera stopped recording when this sort of thing happened.
ProRes and DNxHD files are captured into 1920×1080 Quicktime .MOV files, at up to 220 Mbit/sec, 27.5 MByte/sec, or 1.65 GB/minute. Raw is recorded as uncompressed 2400×1350 CinemaDNG frame sequences, with each clip in its own subdirectory. The DNGs are 5 MB each: 120 MB/sec, or 7.2 GB/minute.
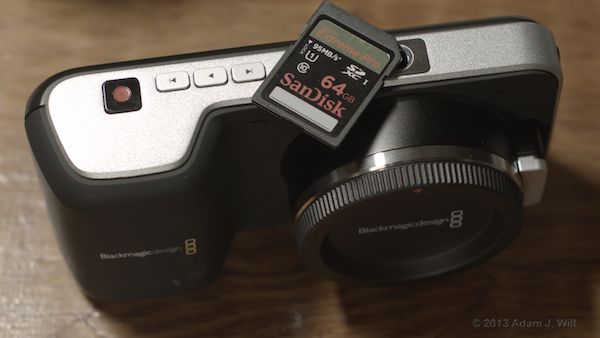
The Pocket Cine Cam records on SD cards; Blackmagic’s approved list is here. ProRes recording is the same as on the Pocket’s big brother, but the raw is saved as losslessly-compressed 1920×1080 CinemaDNGs. A typical frame occupies between 1.8 and 2.3 MB, while an all-white picture compresses down to 286 KB! The compressed DNG format is still not widely understood outside of Resolve; OS X Finder’s preview of a typical frame looks like this:
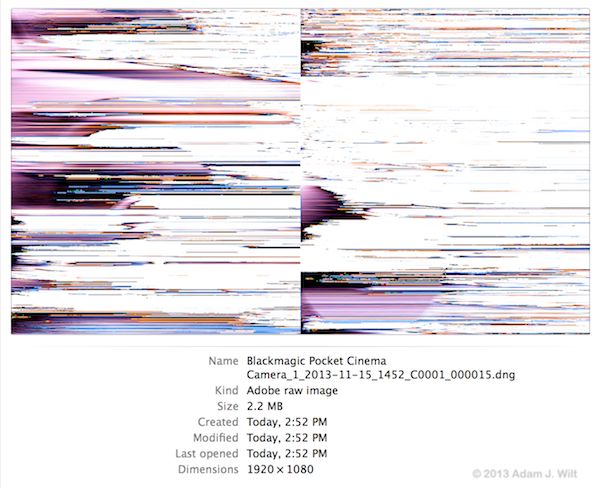
Who needs Willem de Kooning or Jackson Pollock when you have a Pocket Cinema Camera? Fortunately, Resolve 10 has no problem decoding the format and flipping it to any editing codec you desire.
You’ll observe the filename, created with the camera ID, reel number, date, time, and clip number. The camera ID is set up in the Camera Settings menu, and the rest are set in the “slate” panel I’ve been rabbiting on about but never shown. Quit whining, here it is:
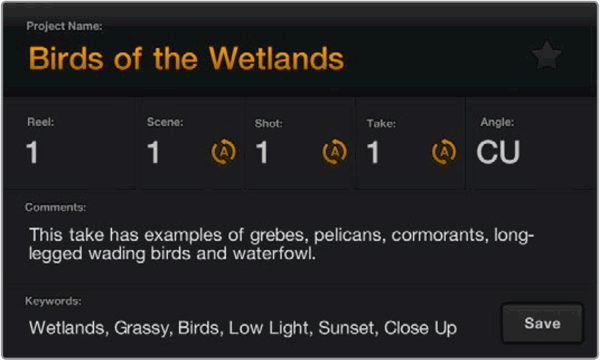
This image was stolen from page 26 of the Blackmagic Camera Manual; it shows the default metadata the camera ships with. Tap a field (Cinema Camera) or select it with the arrows and OK (Pocket Cinema Camera), and a pop-up keyboard appears, just as if you were using an iOS or Android phone or tablet. You can then tap-type blithely away using the Cine Cam’s touchscreen, or laboriously select letters using the arrow keys on the Pocket (it’s a bit tedious to do so. I’ll bet that if we sampled the metadata of all the clips shot on all the Pocket Cine Cams, the vast majority would be closeups for the project, “Birds of the Wetlands”).
The Cinema Camera’s Thunderbolt connection lets a Mac or PC hook up to the camera for monitoring and capture. Blackmagic’s UltraScope software gives you two-up ‘scopes (or six-up, if you have a 1920×1080 or 1920×1200-native display; Retina-equipped MacBook Pros are currently limited to the two-up display regardless of resolution setting). You can choose from WFM, vectorscope, parade, histogram, audio levels and phase, and a live view. Media Express software lets you capture uncompressed 10-bit 4:2:2 video over Thunderbolt direct to disk, complete with live view and audio level monitoring.
Playback
Both cameras allow in-camera playback, but only of clips recorded using the current record setting: ProPres, raw, or (on the Cine Cam) DNxHD.
On the Cinema Camera, the play button plays the current clip; when it’s finished, press play again to replay it. Pressing play during playback changes its status to “play all”, and it will play through all the clips one after another. Stop pauses playback, and pressing stop with playback paused returns to live view. The previous-clip and next-clip buttons cycle through the clips, wrapping from the last to the first and vice versa. Pressed and held during playback, they trigger x2, x4, x8, and x16 playback speeds forward, and x1 to x16 in reverse.
The Pocket Cinema Camera works similarly, but it lacks the stop key. Play is “play all” at all times, and pressing it while playing pauses playback. Press the record key to return to live view.
Post-processing
The Quicktime files are edit-ready straight out of the camera. CinemaDNGs typically need transcoding to be editable in most NLEs. The Cinema Camera ships with a full version of DaVinci Resolve 10, and you can download the free Resolve 10 Lite version for the Pocket Cinema Camera. Resolve not only understands the Pocket’s compressed DNG format, it understands the “BMD Film” gamma and color space both cameras use and has a “Blackmagic Cinema Camera Film to Rec709” 3D output LUT for hands-free log conversion.
Processing with Resolve can be as simple as importing DNGs, setting the raw options and output LUT, and firing off a transcoding job to create edit-ready .movs. Conversely you can dive in and futz with the image to your heart’s content… but that’s a topic for another time; this review is already getting TL;DR.