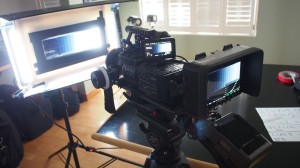
I was very excited last week to hear that Convergent Design had finally released the highly-anticipated firmware update for the Odyssey7Q that added ProRes422 and 4K RAW recording. I’ve been a proud owner of the FS700 for over a year and have loved shooting with the camera, but always wished for an escape from the 8-bit limits of the output and internal recording. The Sony-branded 4K RAW recording solution is large and expensive, but the Odysssey7Q offers similar functionality in a more versatile, compact and affordable package.
 I quickly arranged to conduct a test with the help of my good friend and fellow cinematographer John Tran. John also has a couple FS700s in his inventory and was one of the first in the city to receive an Odyssey7Q.
We had both updated our FS700s to v3.0 firmware last summer (required for 4K RAW output) and have been waiting all this time to actually record 4K RAW to the Odyssey7Q. Camera assistant Chris Goll kept us organized during the test.
We decided that our test of different recording formats (including the internal AVCHD) would focus on these aspects: latitude/dynamic range of available gamma curves and recording formats, bit-depth, chroma-subsampling, and resolution/scaling.
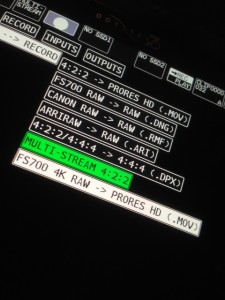
After the Odyssey7Q is updated to firmware v1.1 the record menu will look like this:
-
4:2:2 -> PRORES HD (.MOV)
-
FS700 RAW -> RAW (.DNG)
-
Canon RAW -> RAW (.RMF)
-
ARRIRAW -> RAW (.ARI)
-
4:2:2/4:4:4 -> 4:4:4 (.DPX)
-
MULTI-STREAM 4:2:2
-
FS700 4K RAW -> PRORES HD (.MOV)
The top mode, 4:2:2 -> ProRes HD, is actually ProRes422 (HQ), and effectively the same 220bps recording function you would have in devices like the Samurai, Ninja, Hyperdeck or Pix240. The “HQ” flavour of ProRes422 is 10-bit, but since the HD-SDI output of the FS700 is only 8-bit (256 shades of grey per R,G,B channel,) recording in this mode won’t help with gradients in your image. However, there will still be a decided advantage over recording lower bitrate 8-bit 4:2:0 to AVCHD internally. The FS700’s HD-SDI output is 4:2:2 so the chroma-subsampling is at least better that AVCHD. Framerates of 23.98, 25 and 29.97 fps are available in this mode.
If you want 1080p from the FS700 in true 10-bit, then you will want to purchase the FS700 record key from Convergent Design and use the bottom recording mode FS700 4K RAW -> PRORES HD (.MOV). The 4K RAW setting requires you to change the REC setting in the FS700 to 4K RAW and use either the REC709 or SLOG2 gamma in your picture profile. The FS700 then sends a RAW bitstream to the Odyssey7Q, bypassing the camera’s internal 8-bit processing. The Odyssey7Q debayers the RAW data, crops it from 17×9 to 16×9 and downconverts it to 10-bit, 4:2:2 1920×1080 for recording to ProRes422 (HQ.) The only available frame rates in this mode are 23.98, 25 and 29.97 fps.
The third available option is of course FS700 RAW -> RAW (.DNG), which allows you to record both 2K and 4K RAW from the FS700 in 12-bit CinemaDNG image sequences along with a 48KHz 16-bit wav file for sound. Frame rates of 23.98, 25, 29.97, 50 and 59.94 are available for both 2K and 4K resolutions. However, 2K RAW can also be recorded continuously at 100, 120, 200 and 240 fps. 2K RAW at 200 and 240fps requires RAID0 spanned recording with two SSDs simultaneously, and then the clips need to be re-combined in post-production. Each 4K CinemaDNG frame is about 13.5MB, so each 512GB SSD at 24fps will only last 26 minutes.
RAW recording requires that the FS700 picture profile have either ITU709 or Slog2 set as the gamma curve. When I started working with the Odyssey7Q I couldn’t figure out why a RAW recorder that takes a RAW data signal would care what gamma processing was set in the camera, except for embedded metadata purposes (a target reference for the debayer process.) Unfortunately it didn’t occur to me to test this theory, but I think the intent might also be to allow the viewfinder and HDMI output to show a ITU709 reference even though many more stops of latitude are being recorded in RAW. This will be helpful until the time the Odyssey7Q is capable of loading its own display LUTs.
Latitude/Dyanamic Range Tests
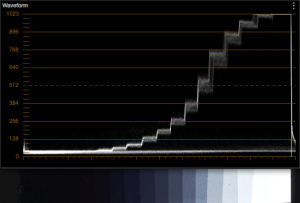
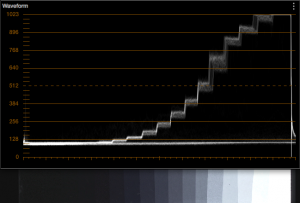
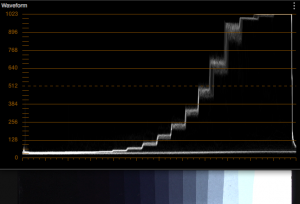
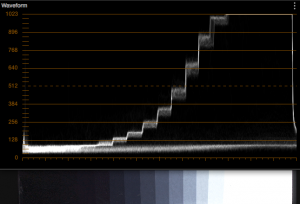
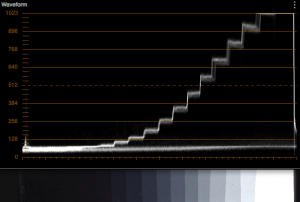
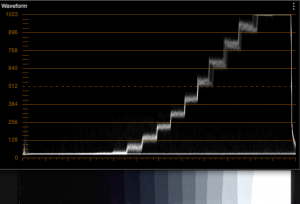
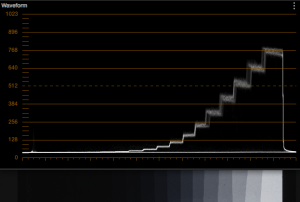
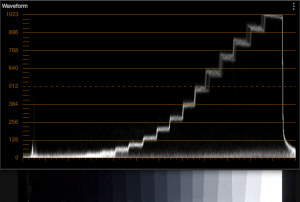
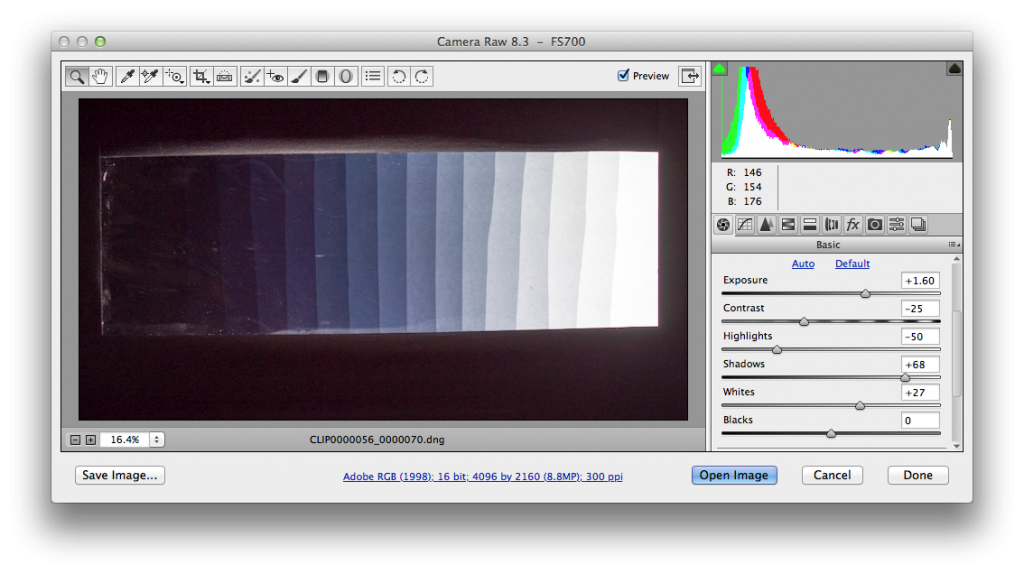
The first test we conducted was latitude/dynamic range. Obviously 4K RAW will have the best results when it comes to available latitude, but I was curious how the Odyssey7Q’s debayer/downconvert to ProRes422(HQ) would compare. To conduct the test I cut 17 pieces of ND.3 gel, stacked and stapled them to a piece of foam core with a hole cut for backlighting by a Diva light. This effectively gave me a 17 stop chart, more than enough to assess the FS700’s sensor.
For comparison I’ve presented below the same chart recorded to 8-bit AVCHD, 8-bit to ProRes422(HQ), RAW to 10-bit ProRes422(HQ), 2K RAW, and 4K RAW. Slog2 is the preferred gamma curve for the most latitude, but we also shot with REC709 for comparison, and a few of the other popular gamma curves (only available in 8-bit.) For direct comparison the exposure did not change between gamma curves and recording mediums. We set the farthest right white level to the clipping point in S-Log2 when the Odyssey7Q was in RAW record mode.
The dynamic range advantage is obviously given to RAW CinemaDNG recordings at just over 12 stops, but the 4K RAW to 1080p ProRes S-Log2 only has around 1-stop less latitude retained than RAW (clips a stop from the top.) Of course, those shadow areas are well into the noise-floor so I would still say the “usable” latitude is 11 stops in RAW or ProRes. Another interesting discovery for those who haven’t upgraded their FS700 yet, is that the Cine4 curve still retains almost the same latitude as SLog2, but has a distinctive S-shape to the curve, which means less need for colour grading in post (adding back contrast), and less chance of having to dig deep into the shadows where 8-bit banding will cause an issue.
The other interesting thing to note about the FS700’s 8-bit processing, versus Odyssey7Q’s 10-bit, is that the 8-bit processing always has a lifted pedestal, where the Odyssey7Q uses every available bit. The practical advantage to this is likely to ensure the user is seeing all the detail available when recording, but also keeps the signal out of the lowest bit values where the toe will lend itself to banding. It also looks like the ITU709 (800%) curve would be very useful in low light scenarios, even in 8-bit AVCHD. I would rate it at 4000ISO at 0dB gain – and it still has 10 usable stops of latitude!
Now if you really need to dig deep into the noise floor you can see (with the help of Photoshop’s CinemaDNG Camera Raw decoder and highlight recovery) that there are actually up to 15 defined stops recorded in the Raw file! DOWNLOAD the ORIGINAL file to test for yourself.
Chroma sub-sampling
Anyone who has ever tried to shoot and key green screen with a 4:2:0 camera knows all too well the shortcomings of extensive chroma subsampling. The internal AVCHD recording of the FS700 uses 4:2:0 chroma-subsampling, but the external outputs can provide 4:2:2 chroma-subsampling. A debayered RAW recording provides an effective 4:4:4 RGB image. The samples below were normalized in DaVinci Resolve before the screen grabs were taken.
| AVCHD 8-bit 4:2:0 Internal | 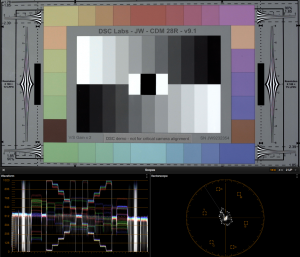 |
 |
| ProRes 8-bit 4:2:2 from HD-SDI | 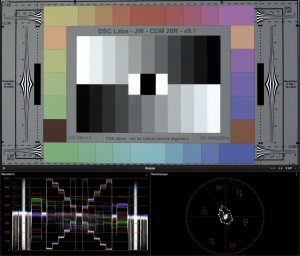 |
 |
| ProRes 10-bit 4:2:2 from RAW | 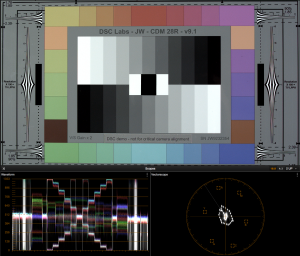 |
 |
| RAW 12-bit RGB | 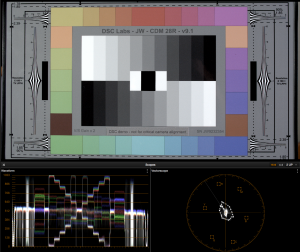 |
 |
Well there are no surprises here. Less chroma-subsampling results in a cleaner image. What is interesting is the detail level in the RAW originated ProRes 1080p 4:2:2 versus the signal recorded in ProRes from the HD-SDI 4:2:2. Once again, the strength of 4KRAW RGB to 10-bit ProRes422(HQ) over direct HD-SDI 8-bit 4:2:2 recording is evident.
Resolution

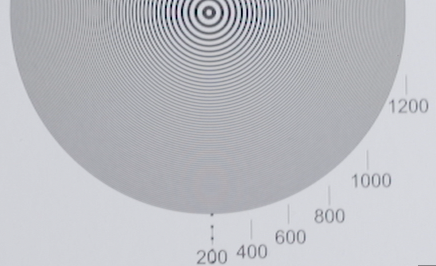
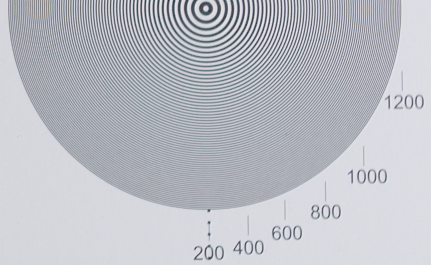
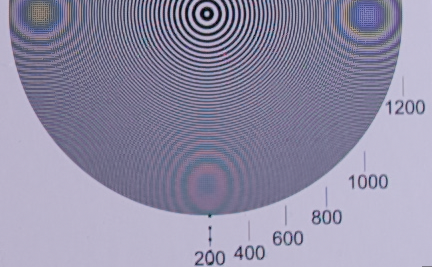
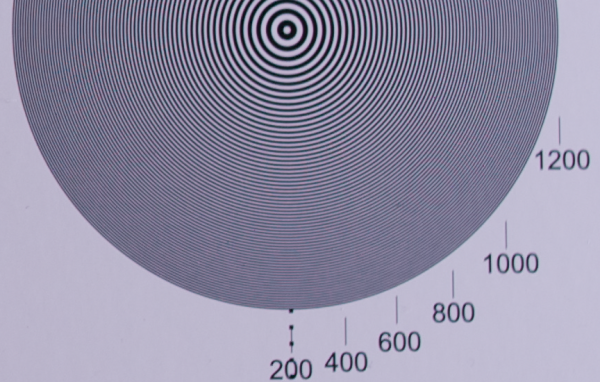
 Obviously 4K resolution will be better than 1080p, but I was interested the the 2K RAW recorded from the FS700 and wondered if it would be better or worse than 1080p? We used a 35mm prime at F4, and a “HD” resolution chart. Here are the results:
I’ll give Convergent Design the benefit of the doubt and say that the obvious debayering/moire issues with 2K RAW will likely be improved over time, and hopefully not only be the result of the 4K optical low pass filter. Also, I’m not sure exactly what is going on with the file size, but the resolution of the 2K file is 2048 x 1072, not 1080? Where did those extra 8 lines go, or does it have something to do with pixel binning at 2K? We didn’t even bother testing in higher frame rates yet. I’m sure we will hear more about this from other users soon.
All 2K issues aside, the obvious winners here are 4K RAW and ProRes422(HQ) derived from 4K RAW.
Post-Production
All of the ProRes422(HQ) files worked as expected in all the Mac apps I tested (Avid, Premiere Pro, Final Cut Pro 7/X, Quicktime Player 7/X and DaVinci Resolve) However, only DaVinci Resolve truly handled the RAW CinemaDNG files without any extra effort.
Avid MC7 currently requires the use of Resolve to “round trip” proxies of the RAW files. The current version of Premiere Pro CC (v7.2.1) imported the DNG image sequence + wav properly, but presented the linear RGB with a completely purple haze. Final Cut Pro X 10.1 can’t seem to import the image sequence properly and instead requires an impractical work-around by creating separate compound clips with all the separately imported frames. At FCP interpreted the colour correctly and I was able to easily convert the linear RGB to an SLog2 style curve with my Camera Gamma plugin.
The Convergent Design import settings for DaVinci Resolve in the user guide seem to conflict with those found in a FS700 RAW pdf on their site. Here’s how I imported and set up the clips in DaVinci Resolve 10.1 (for those new to Resolve):
- Launch Resolve and select or setup an “admin” user and then select “Untitled Project” to open the app.
- If you don’t see the volume with your clips in the upper left, then select DaVinci Resolve Preferences –> Media Storage and click the + button to add your hard drive. Then re-launch Resolve and return to the Media Panel.
- Navigate to the folder with all your clips and drag it to the “Master” bin in the Media Pool.
- Unfortunately the Odyssey7Q doesn’t assign the WAV files any timecode so you will have sync them manually. First change the mode of the Audio Panel to “Dailies” (the little waveform button) and then click on the first WAV file and DNG sequence that has the same name. Make sure the play heads for the video and audio files are at the first frame and then click the “Link Audio” button on the far right (it looks like a chain link.) Repeat for each RAW file.
- Open the Project Settings (the cog in the lower left) and select the “Master Project Settings.” Set the timeline to either 2K DCI (2048 x 1080) or 4K DCI (4096 x 2160.) If you are working with DaVinci Resolve Lite you will be limited to 4K UHD (3840 x 2160.) That’s OK. The native 4K DCI from the FS700 is 17×9 and UHD is 16×9. If you had shot with the intent to center cut 17×9 to 16×9, then use 4K UHD and set Image Scaling –> Input Scaling Preset to “Center crop with no resizing.”
- With Project Setting still open select the Camera Raw tab and change the pulldown in the upper right from Arri Alexa to CinemaDNG.
- Set “Decode Using” to “Project”
- Set “White Balance” to “As Shot”
- Set “Color Space” (and gamma) to “BMD Film”
- Checkmark “Highlight Recovery”
- Click “Apply” and close the Project Settings
- Click on the Edit Page (bottom of screen.)
- Select “New Timeline” from the File Menu and name it whatever you want.
- Drag the video clips (ignoring the WAV files) onto V1 on the timeline.
At this point you have the option to individually colour correct each clip in the Color Page (with or without Covergent Design’s provided LUT,) or skip to the Deliver Page and export ProRes4444 files for Final Cut Pro/Premiere Pro or use the round-trip proxy preset for Avid. To load a LUT in Resolve open the Project Settings (cog wheel in lower left) and select Look Up Tables and then click “Open LUT Folder.” Drag your LUT into that folder in the Finder and then press the “Update Lists” button in Resolve.
Next we will shoot some real-world tests and (if I have the time) post the results.
About The Author
 Tim Dashwood is the founder of 11 Motion Pictures and its sister companies Dashwood Cinema Solutions and the Toronto-based stereoscopic 3D production company Stereo3D Unlimited Inc.
An accomplished director/cinematographer, editor and stereographer, Dashwood’s diverse range of credits include numerous music videos, commercials, documentaries and feature films, as well as S3D productions for 3net, DirectTV, Discovery Channel and the National Film Board of Canada. He also specializes in the previsualization of live action fight/stunt scenes for large-scale productions such as Kick-Ass, Scott Pilgrim vs. The World and Pacific Rim. Recent film credits for cinematography include the films Air Knob, Bob, The Killer and Academy Award Winner Chris Landreth’s Subconscious Password.
As a developer of award-winning software tools for the film industry, Dashwood created the post-production tools Stereo3D Toolbox & Editor Essentials, and the award-winning calibration/analysis/tracking software Stereo3D CAT.
Considered a thought-leader in the disciplines of camera and stereoscopic 3D production technologies, Dashwood has spoken at The National Association of Broadcasters Conference (NAB), International Broadcasting Convention (IBC), South By Southwest (SXSW), University of Texas at Austin, Canadian Cinema Editors (CCE), Creative Content World (CCW), AENY, DVExpo, Reel Asian Film Festival, ProFusion, Banff Centre, TFCPUG, CPUG Supermeet, The Toronto Worldwide Short Film Festival and the Toronto International Stereoscopic Conference.
Dashwood graduated with Honors from Sheridan College’s Media Arts program in 1995 and returned to its Advanced Televison and Film program in 2000/2001 to study with veteran cinematograher Richard Leiterman CSC. Dashwood is an associate member of the Canadian Society of Cinematographers.

