
The bread-and-butter work in my area is corporate marketing projects, and plenty of those involve talking head videos. And plenty of those talking heads wear white shirts. This is what I do about it…
White shirts aren’t as deadly as they used to be. In the old SD and early HD days they were deadly, as the average white shirt came close to clipping just by sitting in the key light. Now it takes a little extra work to make that shirt blow out, but as it’s still the brightest thing in the frame it’s often nice to mute it a bit so the interview subject, the most important thing in the frame, isn’t visually overwhelmed by their own clothing.
The issue is that faces look best when lit by soft light, and interview subjects generally benefit from that soft light source being as close to the edge of frame as possible so that the light wraps around the subject pleasantly and their skin glows with soft specular highlights, but this kind of light source is almost impossible to cut with any precision. On more than one occasion I’ve seen a grip struggle to cut light that’s cast by a 4’x4′ frame of diffusion located 3′ away from the subject, and it almost never works: more often than not they simply take down the light level overall,
I’ve developed a trick, however, that works reasonably well.

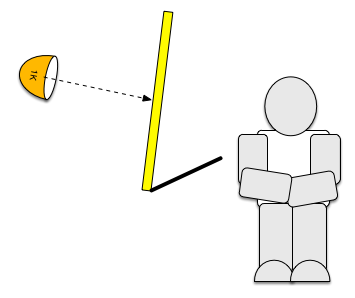
This is a rough example of the lighting setup described above. Normally the source might be a little more frontal, but you get the idea. This kind of lighting makes nearly everyone look great.
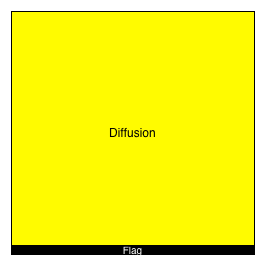
“Let’s flag that shirt,” the gaffer says, and he or the key grip grab a solid and usually do the following:
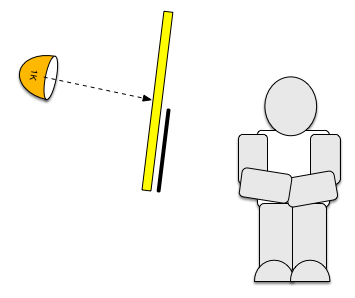
From the subject’s point of view, they see this:
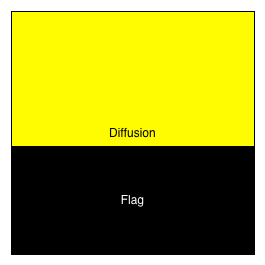
We haven’t actually cut any light off a portion of the subject, we’ve just made the light source appear smaller and about half as bright. The goal is to leave all the light on the subject’s face but take it, selectively, off the shirt.
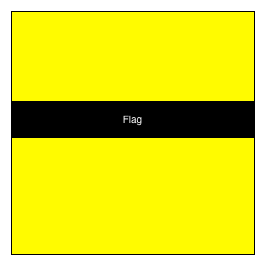
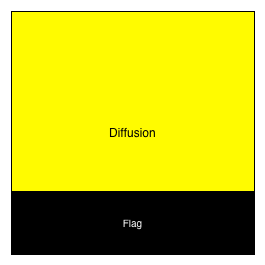
We could try to “eggcrate” the light:
From the subject’s perspective, the light source looks like this:
If you were to stick your head next to the subject’s head and slowly move it downward in front of the shirt, you’d see this:
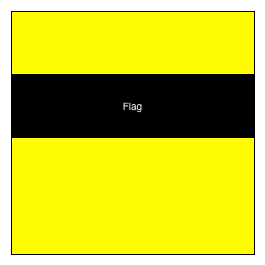
The farther down you go the less you see of the top half of the light source, which reduces exposure on the shirt by about a stop.
This is a trick I use very occasionally for other things, but it’s startling how directional this can make a source. At a distance it doesn’t make a huge difference, but if you’re right next to it you’ll get full exposure if you stand in exactly one spot and lose exposure if you shift only a little bit one way or the other. At close quarters, such as in a situation like this one, the exposure on a person’s face can change noticeably if they simply slouch… even though they’re lit by a huge source only a few feet away!
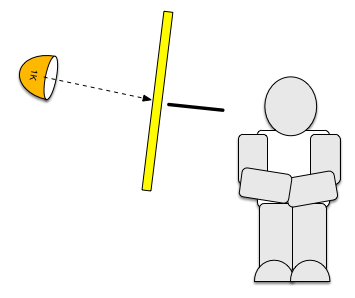
I needed a better strategy. Eventually I came up with this:
This is deceptively simple. The placement of that bottom flag has to be pretty precise: it should aim along a straight line between the bottom of the light source and the subject’s collar.
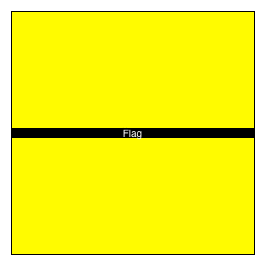
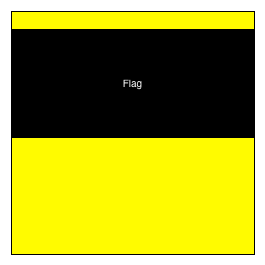
Here’s what the subject sees:
If you put your head alongside theirs and move it down in front of their shirt you’ll see:

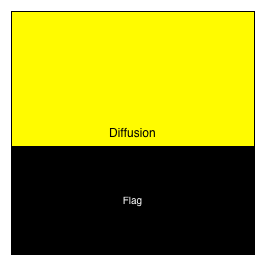
The farther your head drops the less of the light source you’ll see. This is still semi-directional in that an interview subject who slouches four or five inches will start to put their face into shadow, but the cut isn’t nearly as sharp as the previous method. It still does the job reasonably well, but the transition is softer and more forgiving.
Just be sure to aim the flag edge-on at the point you want the cut to start (usually the subject’s collar).
There’s really no way to take soft light off a white shirt at close range with any precision, but this method introduces a sort of “live grad” effect where exposure drops off by about a stop between the subject’s neck and waist. It’s not a bad way to go.
I joke that I learned to light long ago by being a young second camera assistant who stood everywhere the electricians wanted to put a light. Now I spend a certain amount of my time teaching my crew how to cut things in ways they’d never thought of, simply because they’re used to using flags in a very direct way–put it in front of the light!–while I’m thinking of what happens if I put the flag edge-on to things that I want lit and sideways to things I don’t want lit. But… that’s what DP’s do: we think about light far more than is healthy. It’s part of the job, but also part of who we are.