
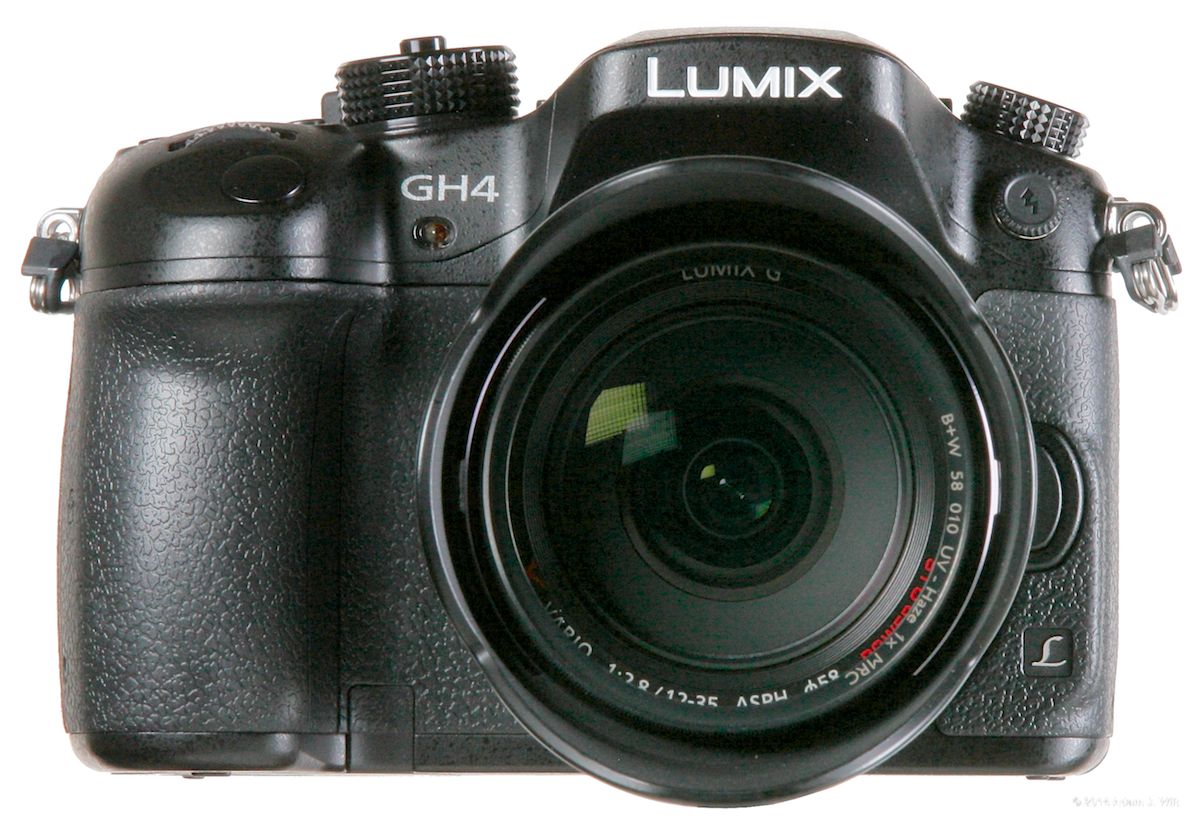
GH4 with 12-35mm f/2.8 zoom. (Most pix in this article get bigger if you click ’em or tap ’em.)
[Updates 22 July 2014: Audio Buzz fix; 14 June 2014: dynamic range is 11+ stops; details to come in a follow-up report. 17 May 2014: added another video link; clarified dynamic range estimates (~7 stops ungraded, ~10 stops if you stretch the shadows).]
Panasonic’s DMC-GH4 is a $1700 (street price) hybrid stills/motion EVIL camera – Electronic Viewfinder, Interchangeable Lens – with a micro four thirds (MFT) lens mount. The Big Deal with the GH4 is that it shoots 4K, but it also offers a host of refinements – variable frame rates from 2 – 96 fps, focus peaking, zebras, cine gammas, and more – that arguably make it better suited to video work than any other hybrid camera currently available.
Even in this febrile age, the GH4 has been more hotly anticipated than most new cameras. And when a mass-market hybrid evokes the same pre-release hysteria as, say, the Digital Bolex or the RED ONE (or, back in its day, Panasonic’s own HVX200), there Must Be Something Going On.
Is this the ultimate indie camera? Is this caption the ultimate click-bait?
“What the heck”, I said, “why not pre-order one? It’s only $1700; at worst, it’s a backup to my GH3, but with focus peaking.” And pre-order one I did. Here’s my initial review of the beast, focusing on its physical layout and video-specific features (especially where it differs from the GH3), and taking a first look at its performance: resolution, color rendering, and so on. I’ll discuss dynamic range, highlight handling, and recording options in a perfunctory manner, but doing justice to the complexities and subtleties thereof requires more detailed testing than I’ve done so far. Stay tuned…
Initial Impression
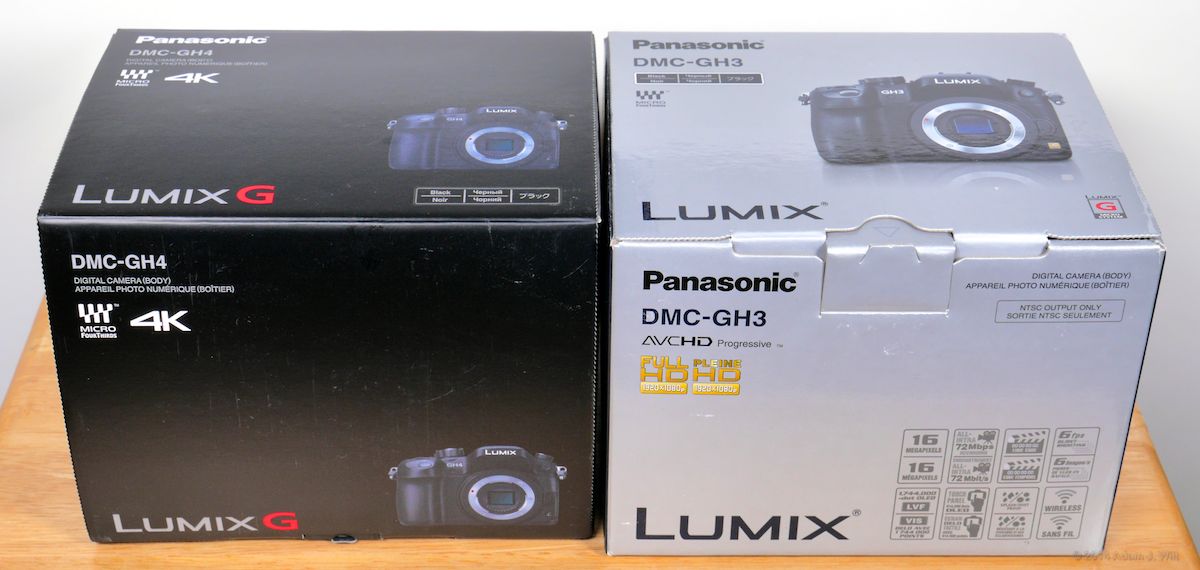
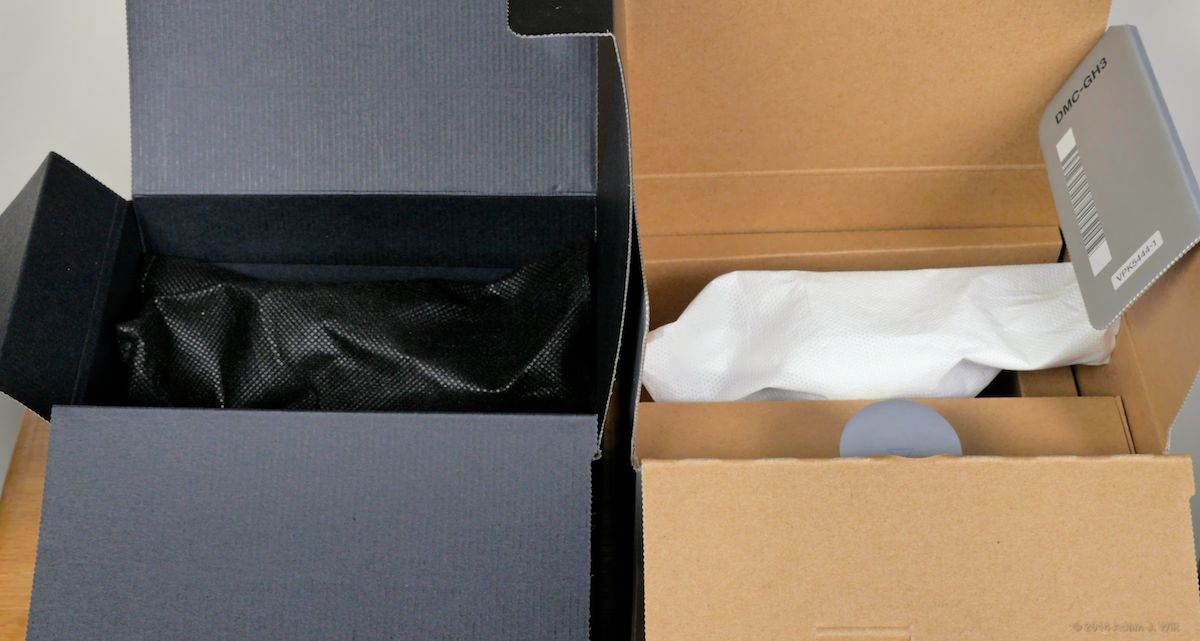
The sense of Something Special is reinforced when the GH4’s small, lightweight box arrives at one’s door. Other GH-series cameras come in silver packaging, which opens up to reveal the camera body wrapped in a white cloth dustcover, neatly packaged in a plain cardboard carrier. Not the GH4, oh no: its box is all black, outside and inside, and the camera itself is ensconced in a black cloth dustcover.
The camera itself is a near-clone of the GH3, with only a few differentiating visuals: five symbols on the left mode dial instead of four, a 25% taller shutter-mode dial with a locking button in its center, an extra tactile nub on the ISO button, a larger eyecup, mysterious rubber plugs on the bottom plate… and a discreet 4K logo behind the flip-out LCD.
Layout and Controls
The GH4 is a camera body in the DSLR form factor, about 5.25″ x 3.7″ x 3.3″ (133mm x 93mm x 84mm) and weighing 1.25 lb or 560g with battery and SD card, but no lens. In real-world terms it’s about 40% lighter than a Canon 5D Mk II and rather a bit smaller:
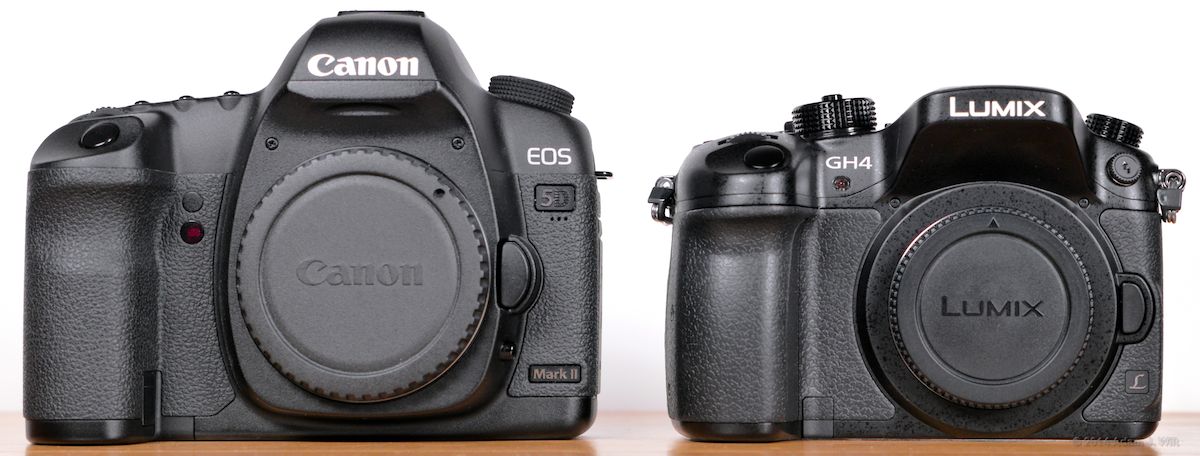
Canon 5D Mk II vs. Panasonic DMC-GH4.
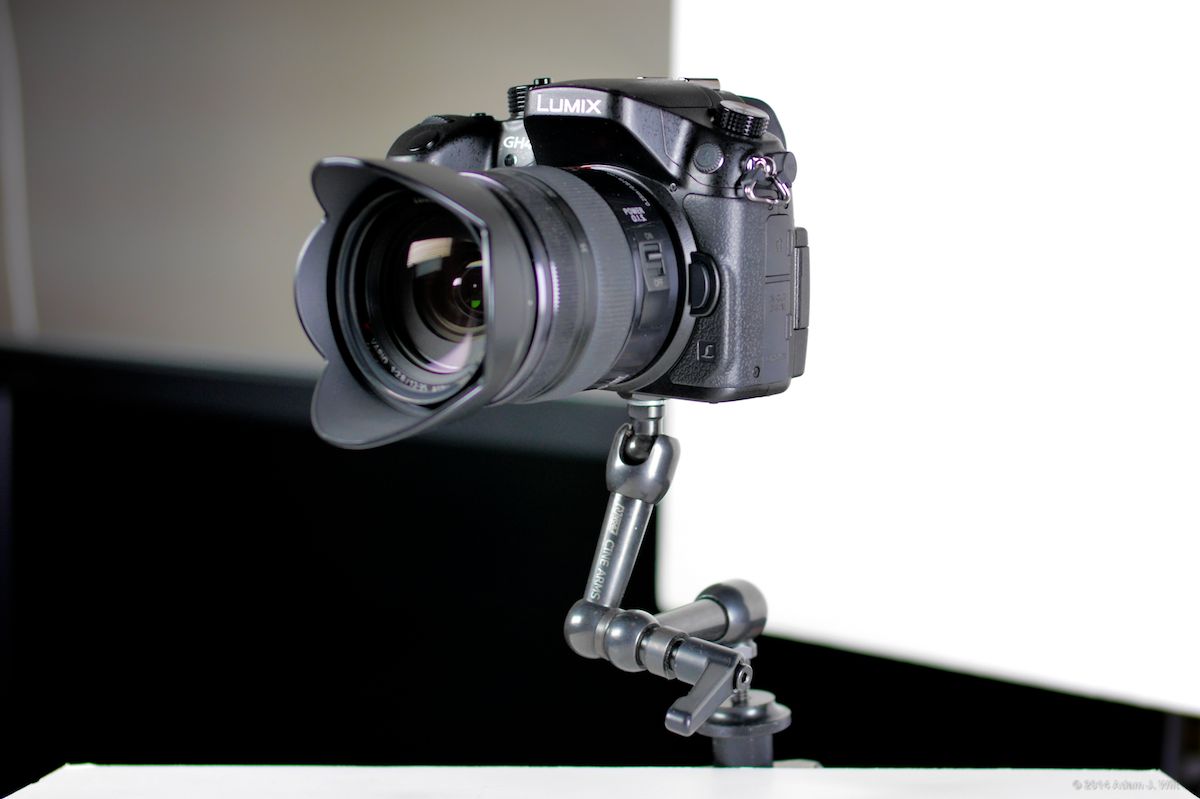
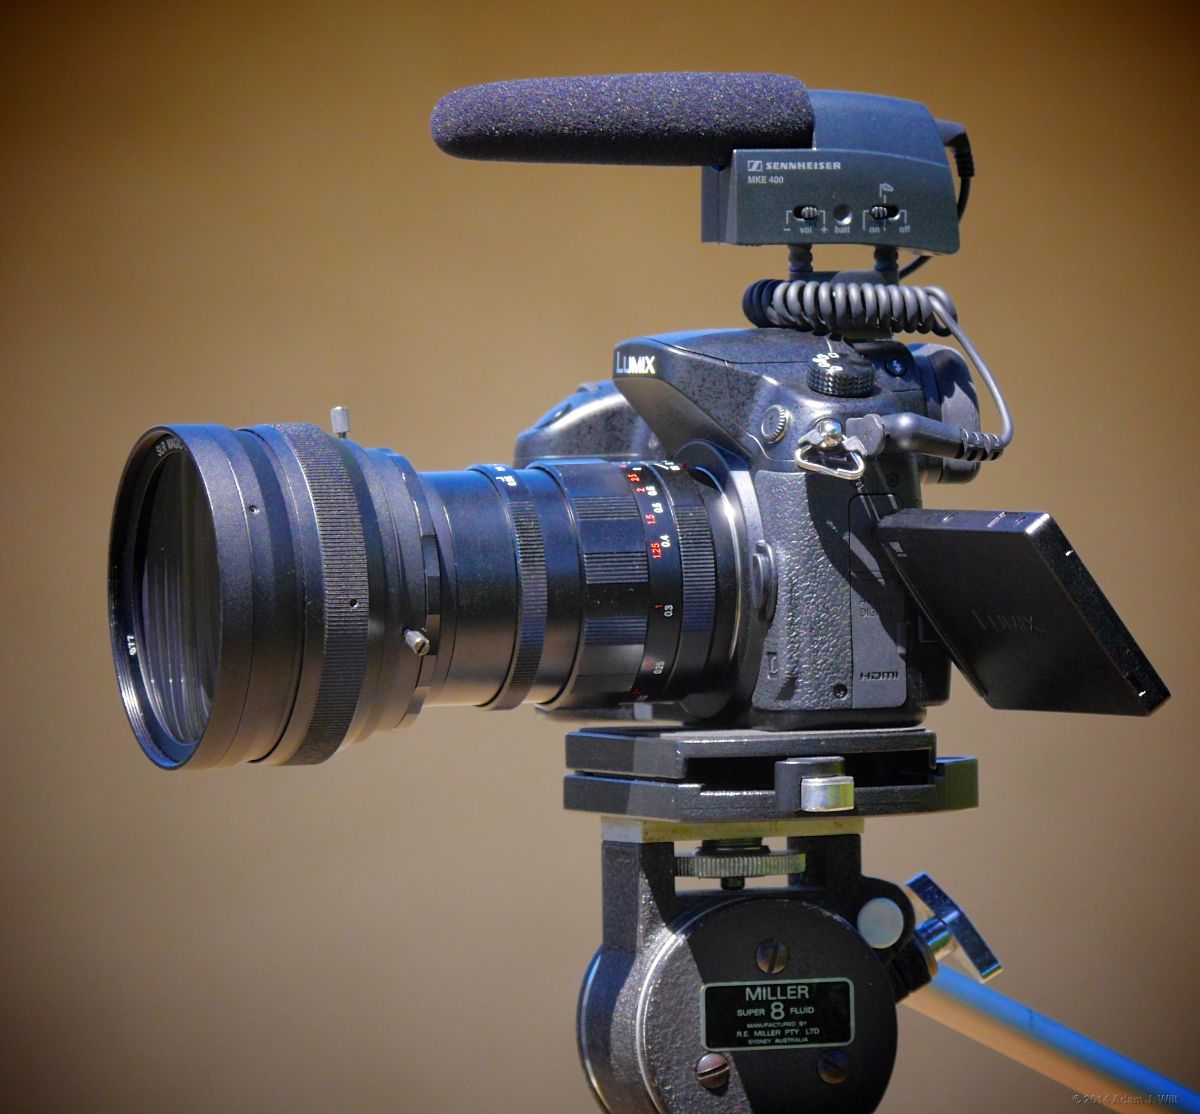
The GH4 is light enough to mount on a magic arm.
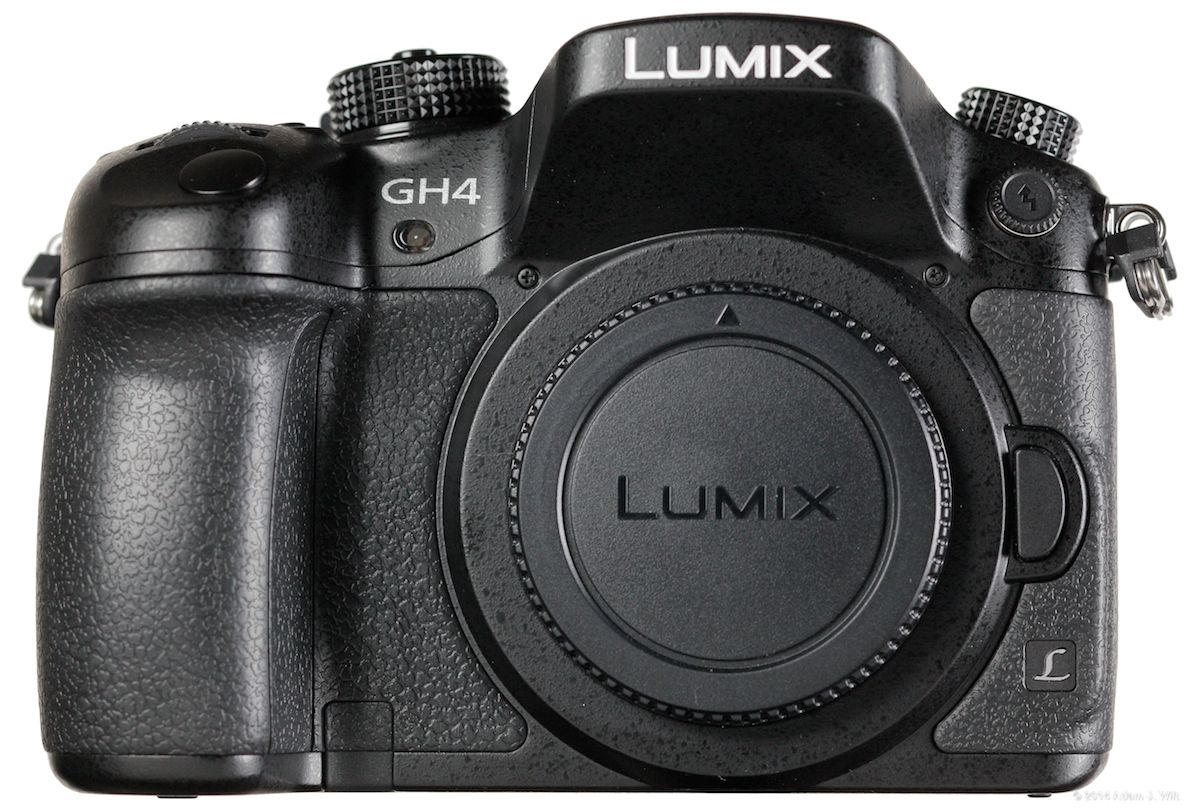
GH4 front view.
The front is dominated by the large and comfortable handgrip. An orange LED under the GH4 name is used for autofocus assist in low light, if enabled (it won’t illuminate when you’re recording video). A flash sync terminal sits in the top right corner, and the lens release button is at the 3 o’clock position.
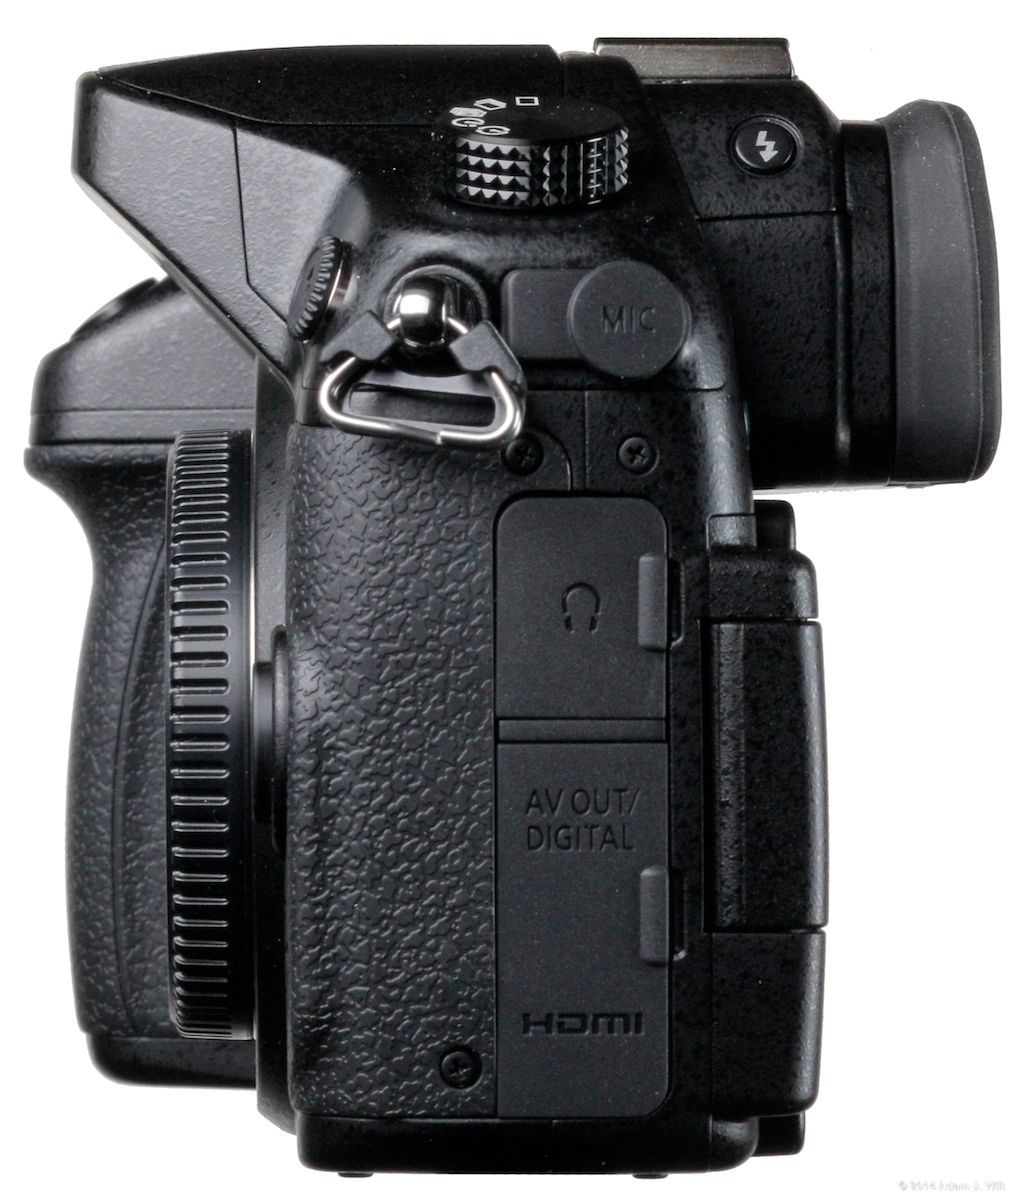
The left side has rubbery flip-out covers for the 3.5mm stereo mic jack the the top, a 3.5mm stereo headphone jack in the center, and USB & A/V and micro-HDMI ports on the bottom. There’s a flash pop-up button on the EVF.
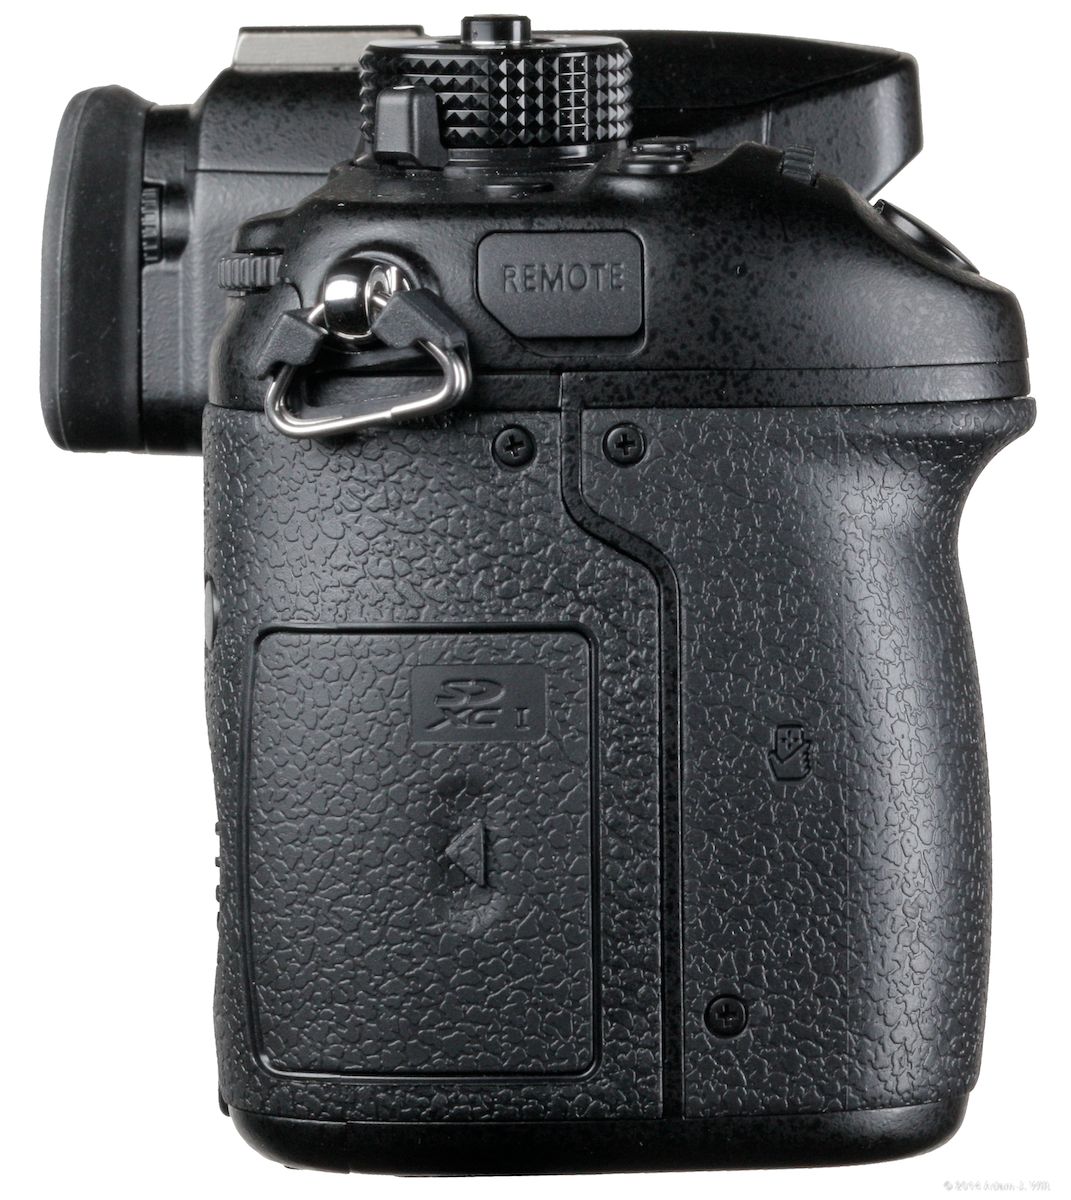
The right side reveals another rubbery cover over a remote-control port, and the SD card slot door. At the back of the EVF there’s a diopter dial to adjust the eyepiece to your eyesight.
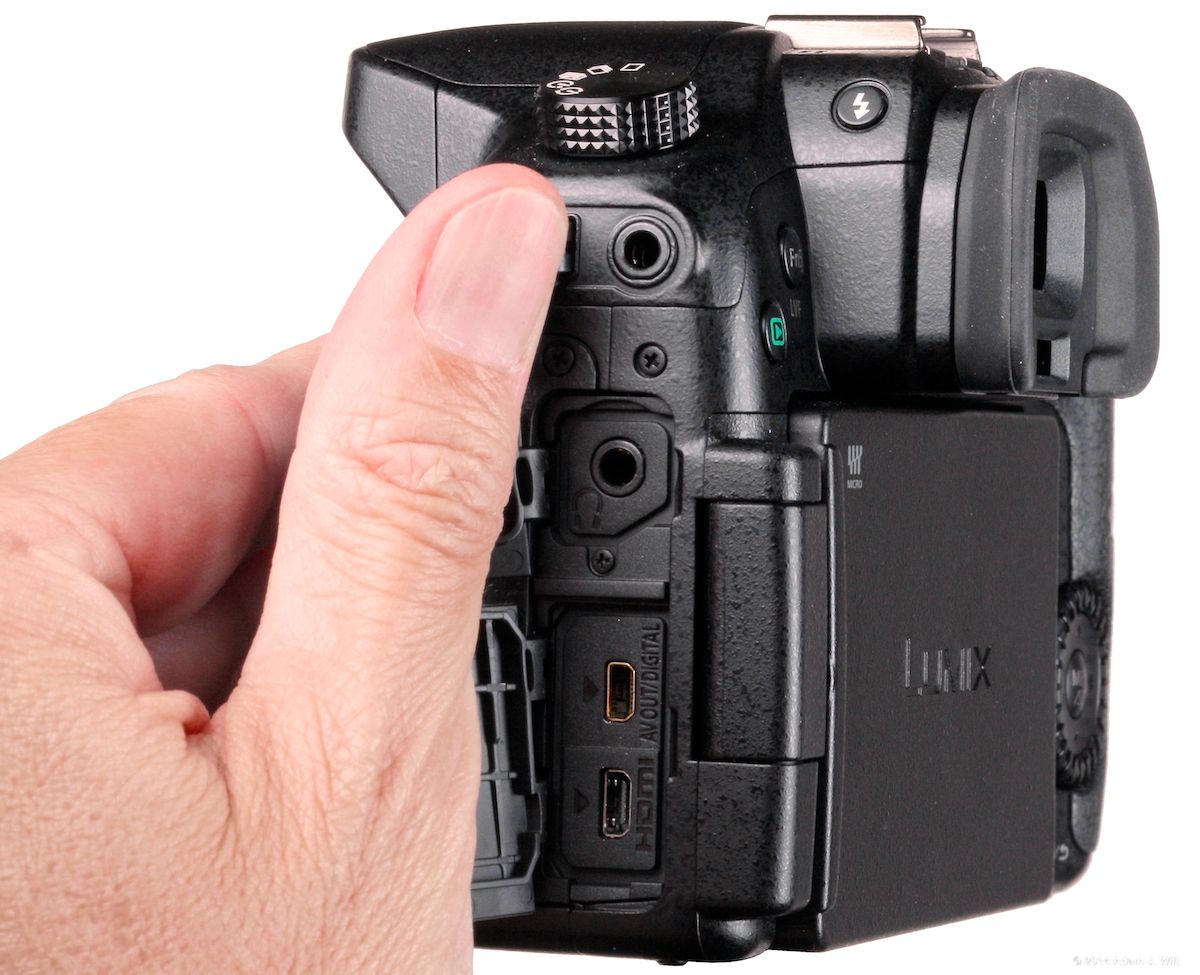
The I/O connector covers swing open on rubbery hinges, and tend to spring back if not restrained. The lower two, if not pressed firmly into place, can impede the rotation of the flip-out monitor.
The AV OUT / DIGITAL connector is the same small, finicky plug used on the GH3. The GH4 uses a micro-HDMI connector instead of the mini-HDMI port seen on earlier GH cameras. The two connectors have been swapped compared to their locations on the GH3, and the similar sizes of the two plugs makes confusion easy. Neither connector is easy to orient and seat, especially if your other hand is busy holding the rubber doors out of the way. However, the lower position of the micro-HDMI plug means that the monitor can be swiveled farther without interference: helpful if you’re feeding video to an offboard monitor/recorder or using Panasonic’s DMW-YAGH SDI / digital audio interface unit.
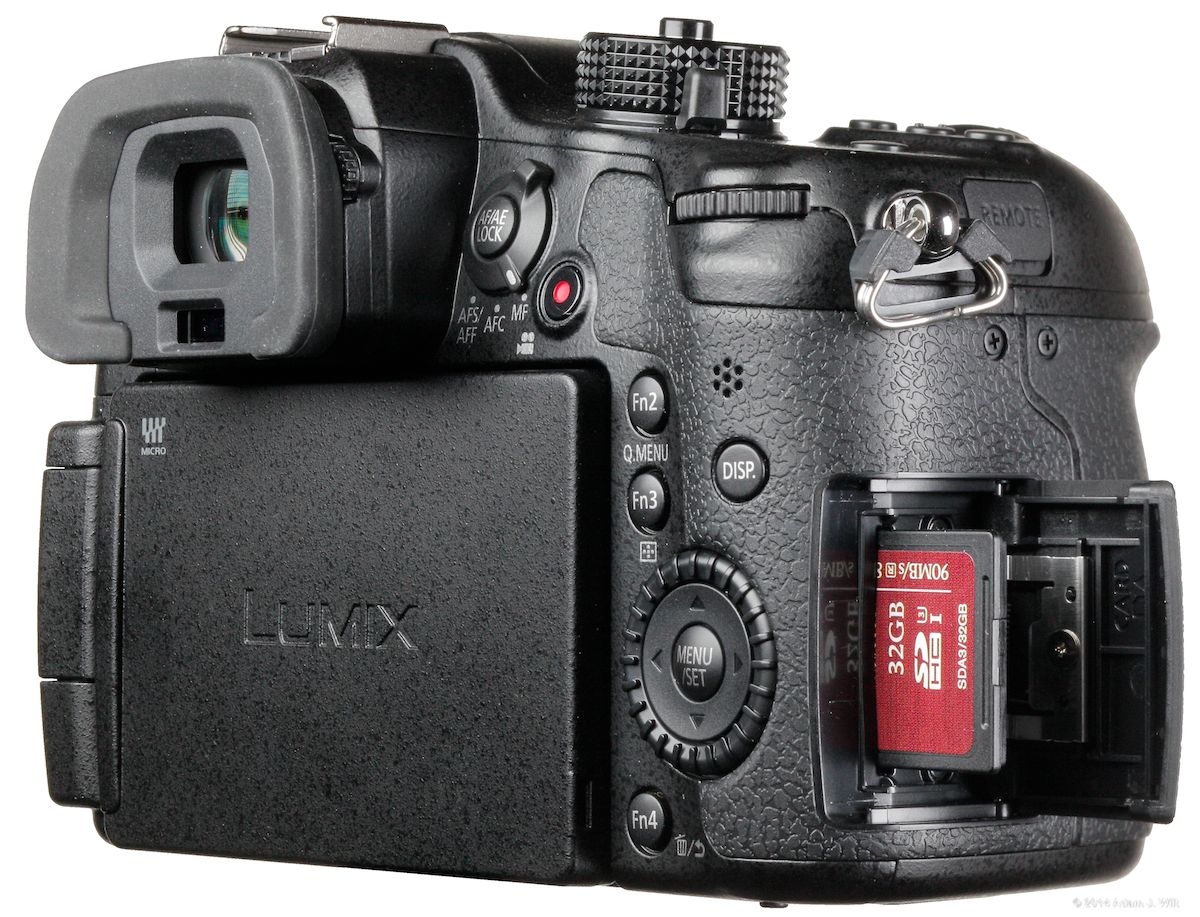
The camera has a single SD/SDHC/SDXC card slot with a spring-loaded door: pull it back, and it pops open. The GH4 wants speed class 4 cards for AVCHD; class 10 / UHS class 1 for 50 Mbps recording; and UHS class 3 for 100 and 200 Mbps recordings.
On the GH3, this door is very lightly latched, such that I often open it accidentally whenever I release my grip on the camera: my hand, sliding back, pops it open. From an operating standpoint this is my biggest single annoyance with the GH3. I’m happy to report that the latch on the GH4 is much stronger, and the door stays firmly closed with normal handling.
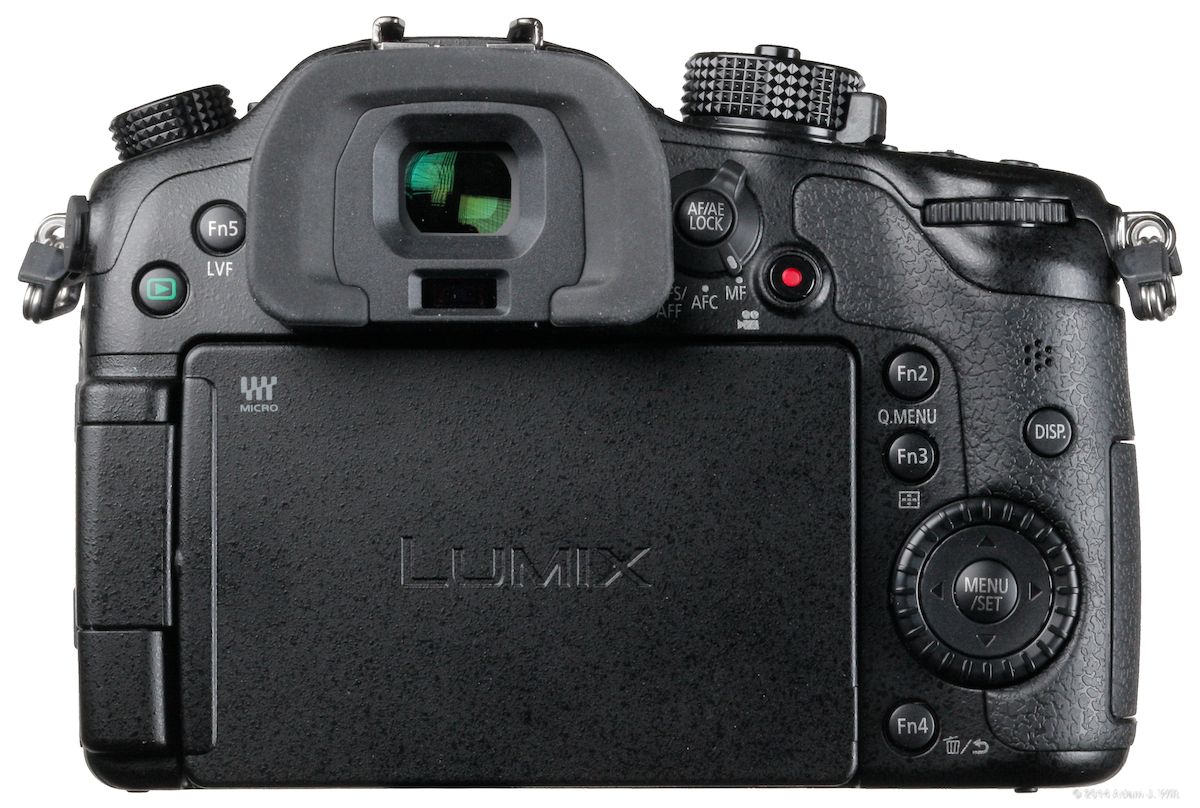
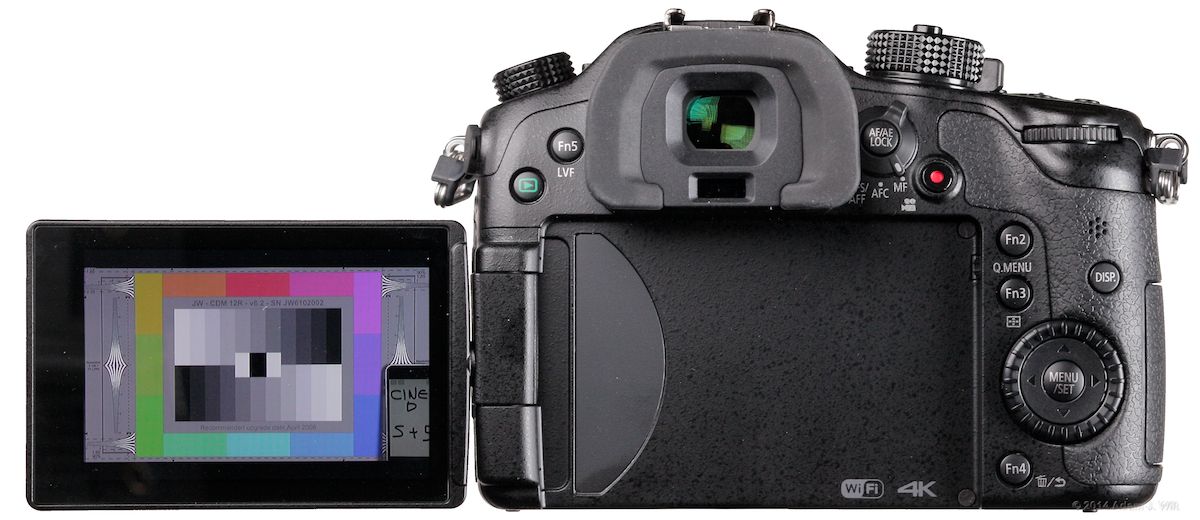
The backside of the camera has a play-mode button in green, and an LVF/Fn5 button. By default, this toggles the display between the EVF and flip-out monitor, but you can assign another function to it. The automatic toggle (controlled by the eye-sensing window just below the viewfinder eyepiece) is very good on the GH4, but I keep Fn5 set to LVF in cases where the sensor can be fooled, typically where I’m using the camera handheld low to the ground and/or with the monitor opened halfway for operating in tight corners.
A hefty rotating switch selects between manual focus, continuous autofocus, and one-shot autofocus; its programmable pushbutton can be set to lock focus, exposure, or both. A red video-recording button allows full-auto video recording when in stills mode; it’s not used in “creative movie mode ” (e.g., the video-only mode where you can set all the recording parameters yourself) and can be disabled in the menus, though sadly it can’t be reassigned to another function.
Fn2 and Fn3 are both programmable. Fn2 defaults to “Quick Menu”, an array of menu options displayed at the top and bottom of the image; Fn3 controls focus magnification. Fn2 and Fn3 are the same size and shape, and I find that I often confuse them when seeking them out by touch.
Fn4 normally controls aperture / shutter preview effect (in stills mode), file deletion in playback, and menu exit functions, but you can change what it does during shooting.
A 4-way rocker and rotating selection dial surround the MENU/SET button, which is used to enter the main, multi-tabbed, multi-paged menus. The rocker, dial and set functions work for most manipulations: navigating and selecting menu items from the main or Quick Menus, moving the histogram around the screen, moving and resizing the focus area.
DISP toggles data overlays on and off; when the monitor is in use it also includes picture-off and data-only modes in its selections: presumably you’ll have the live image displayed on an external monitor in these cases or be using the EVF to look at the image and the monitor for the settings and exposure data.
Above DISP, seven small holes let the playback speaker be heard, and the thumbwheel at the top is used for shutter, aperture, or exposure compensation depending on the mode and your preference settings. It is also used to select items within a top-level Quick Menu selection.
The EVF is a 4×3 OLED display with 2.36 million pixels and 100% coverage: it’s bright, responsive, seems to be very color-accurate, and is high-res enough that individual pixels are just barely at the limits of perception. Its taller-than-HD, 1.33:1 aspect ratio lets most data displays reside outside of picture area.
The 3″ touchscreen OLED monitor has “only” 1.04 megapixels, yet it’s still crisp and jaggy-free. The monitor swings open 180º and then rotates 180º upwards (to face forward, at which point it can be folded back against the body) or 80º downwards… loose connector doors allowing, of course! The monitor has a 3×2 (1.5:1) aspect ratio. It’s adequate for outdoor use, even in sunlight, though the EVF remains preferable on a bright day.
GH4 monitor in full sun. Data overlays dimmed 50% to reduce burn-in.
Both displays resolve on the order of 600 TVl/ph, but focusing is still best done as on other EVFs, with a combination of peaking, focus magnification, and looking for aliases along sharply-focused edges.
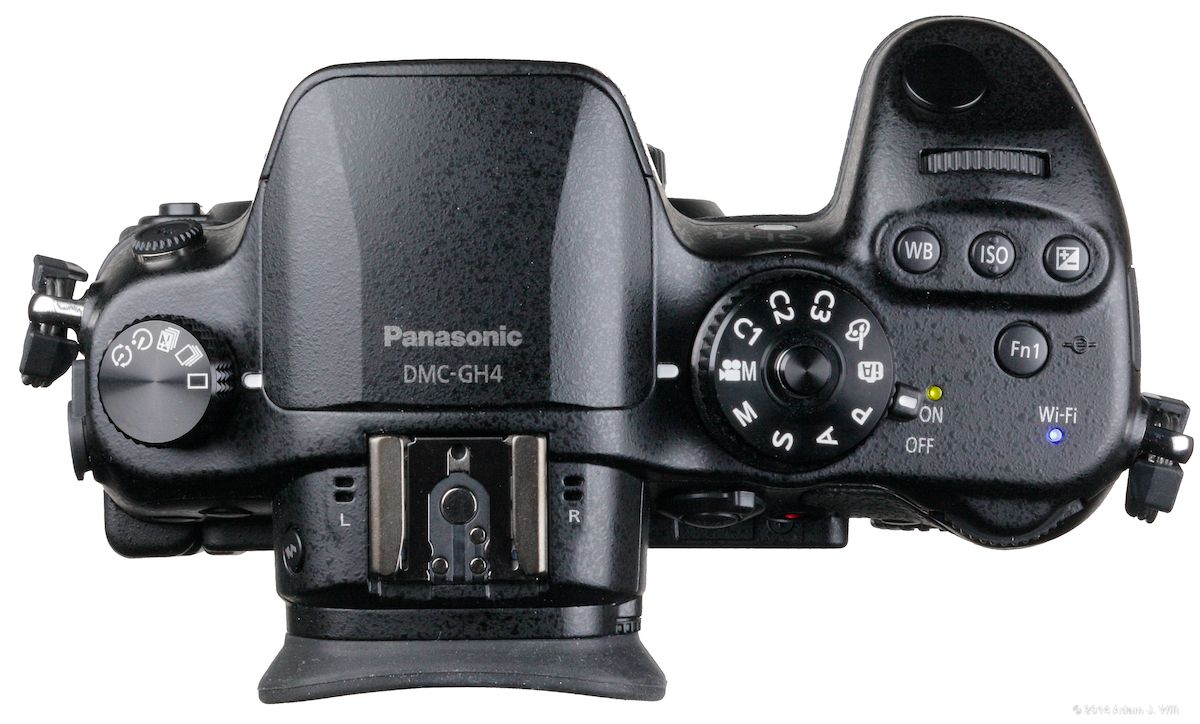
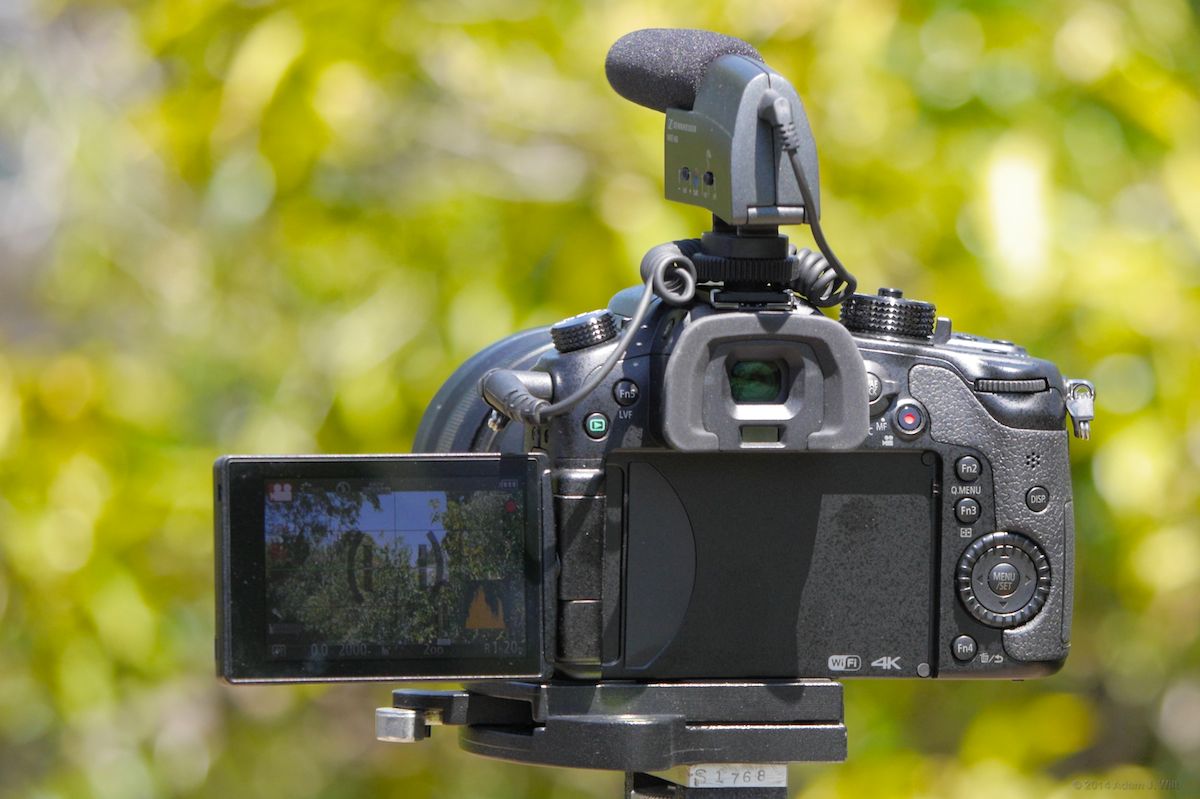
At the left of the top panel the GH4 has a shutter mode dial, with positions for intervalometer (new on the GH4), self-timer, bracketing, burst-mode (motor-drive), and single-shot still-photo shooting modes. In the center, there’s a pop-up flash, a hot shoe with contacts for Panasonic-specific accessories, and the built-in stereo mics (which do a great job picking up ambience, including camera handling noise as well as the unconscious grunts and groans of the operator!).
The main mode dial resides just right of center. It has a locking button in the middle to prevent inadvertent rotation, though this hasn’t been a notable problem with earlier GH cameras. The mode we’re interested in is the “creative movie mode”, helpfully marked with the icon of an iconic movie camera. In this mode, the main shutter button (top right corner of the top panel) controls video recording, and you have free reign over settings: shutter speed, aperture, ISO, frame rate, image size, recording format, and so on. The three custom positions C1 – C3 are also useful: you can assign a “snapshot” of current settings to each one, so you could, for example, set up C1 for 4K 24p in monochrome, C2 for 1080/60p with vivid color, and C3 for 1080/24p with variable frame rates and a more muted palette.
The main power switch is concentric with the mode dial, and easily operated with the thumb. It has a bright green LED to show that the camera is on. The camera boots virtually instantaneously: you can be rolling inside of one second from powering up, well before you’ve had a chance to frame or focus.
Fn1 normally turns on WiFi for remote control, and it has a blue status LED. The button can be reprogrammed; the LED cannot be (not that one needs to reassign an LED, but it would be fun).
Three buttons allow immediate access to white balance, ISO, and exposure compensation, as on the GH3. The ISO button has two small bumps on it, making it easily distinguished by touch. In practice this makes all three buttons much more usable by feel; on the GH3 I’m frequently prodding the wrong button (the GH3’s ISO button has only a single, easily-missed bump; I didn’t even realize it was there until I wrote this article), but I’ve yet to push the wrong one on the GH4. Here’s hoping Panasonic puts a bump or two on Fn2 or Fn3 when they design the GH5.
A front thumbwheel chooses aperture or shutter (whichever one isn’t on the rear wheel) and chooses top-level Quick Menu items, among other functions.
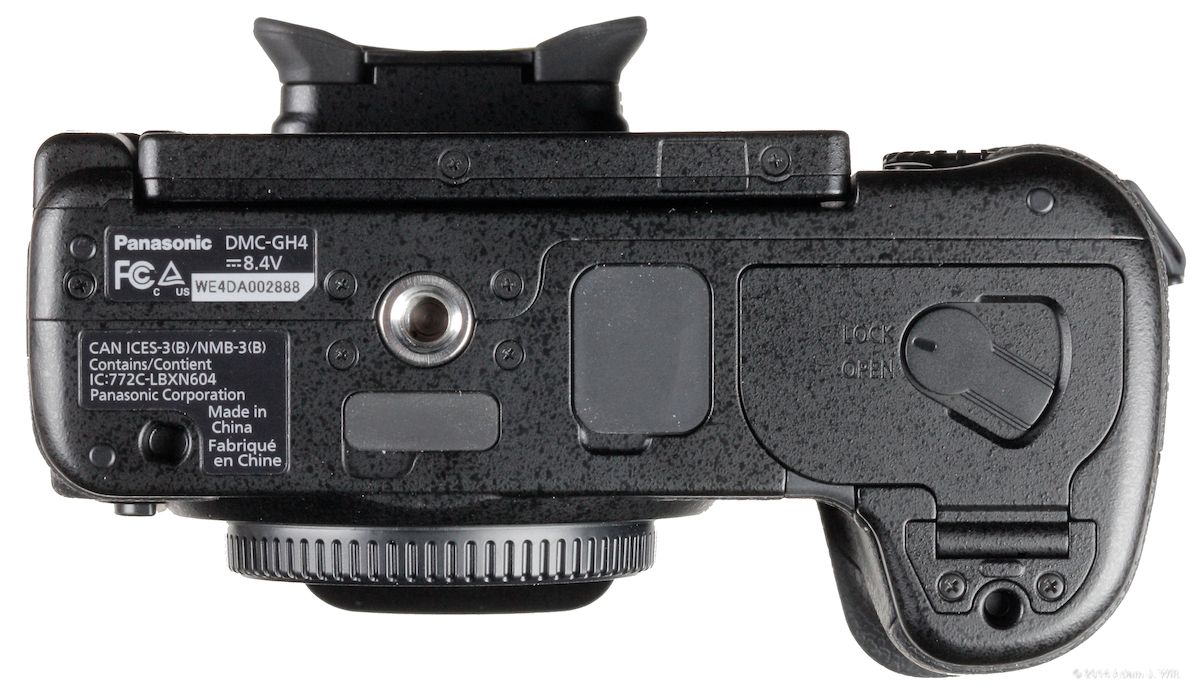
The bottom plate has a center-mounted 1/4″x20 tripod socket, the spring-loaded battery door with a firm and positive rotating latch, and two mysterious rubber plugs…
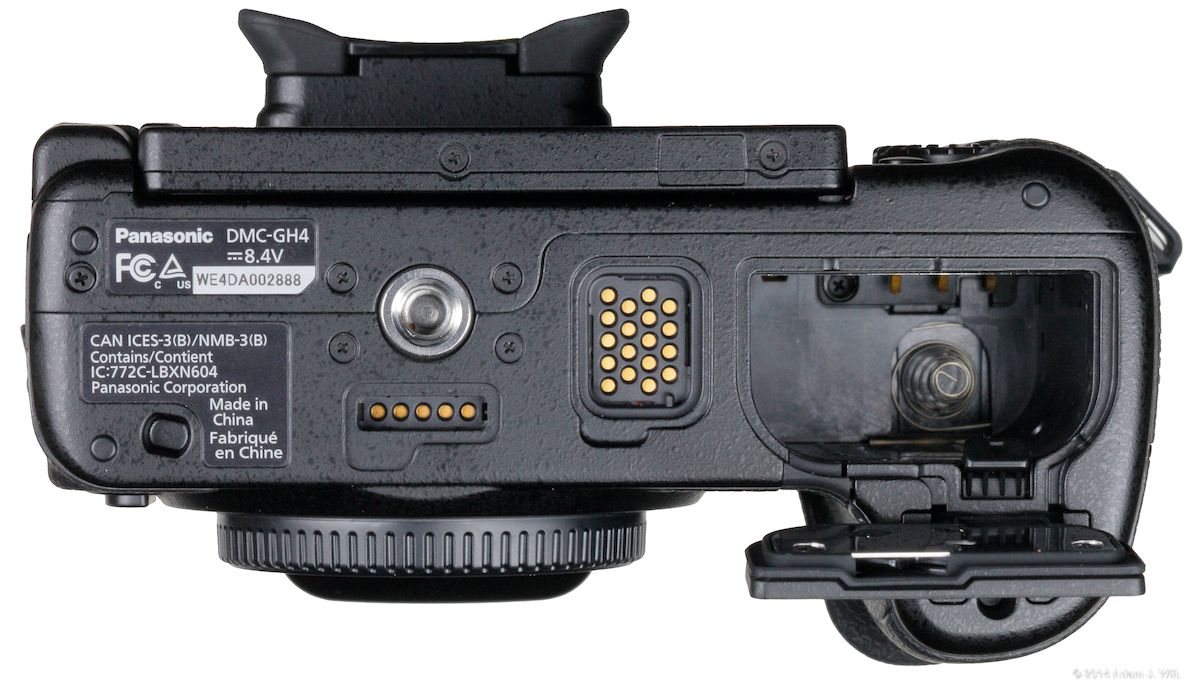
…which cover the contacts used by the DMW-YAGH to convey power, audio, and other signals to the GH4.
The battery is a 7.2volt, 1860 mAH DMW-BLF19PP, the same as used on the GH3. The Panasonic batteries are around $80, but I’m happy to report that the 2000 mAH Wasabi BTR-BLF19-JWP ($36 for two, with a compact wall charger) works perfectly well. Batteries last for hours; it’s not like the GH1 or the GH2 (or the RED ONE, for that matter) where you’re always nervous about your state of charge, even with a topped-up battery freshly installed.
Lens Mount and Lenses
The GH4 uses a MFT mount, with a shallow flange depth (19.25 – 20.0 mm, depending on which part of the Internet you believe). This shallow flange depth allows both native MFT lenses and a wide variety of others (Nikon F, Canon EF and FD, M-mount, PL-mount, even C-mount) via adapters.
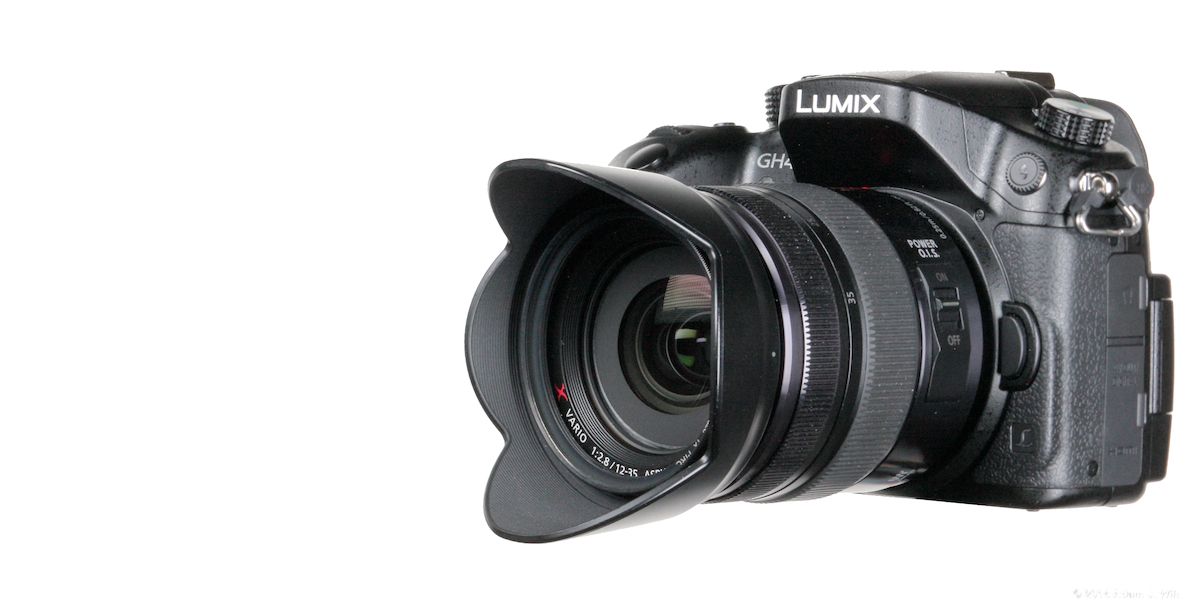
GH4 with Lumix 12-35mm f/2.8 (native MFT).
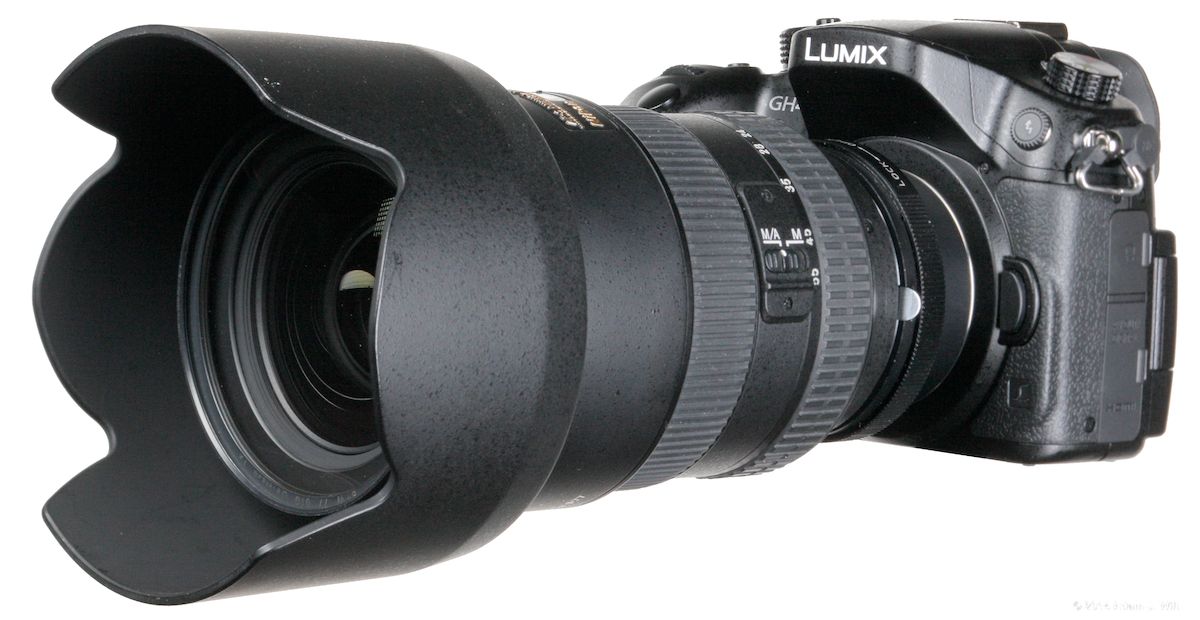
GH4 with Nikkor 17-55mm f/2.8, via F-to-MFT adapter.
Some caution is needed, though; MFT mount flanges are relatively thin and narrow, and I wouldn’t recommend hanging anything heavier than the short Nikkor zoom shown on it, not without a proper lens support.
A company called Metabones builds Speed Booster adapters, combining a mount with a condensing relay lens. Speed Boosters shrink the lens’s image, so that (a) you get a wider view, closer to what the same lens would show on a larger-format sensor, and (b) a boost in light, so that your lens effectively gains a stop or so. Since MFT sensors are about 70% the size of Super35mm sensors, a Speed Booster can get you much closer to “angle-of-view parity” with traditional cine cameras. I haven’t used one – I’m waiting (perhaps in vain) for a Canon EOS-to-MFT Speed Booster with electronic aperture control – though field reports are generally positive.
Displays and Shooting Aids
The GH4 allows a clean image, or one cluttered with data:
Clean image on the GH4’s flip-out monitor.
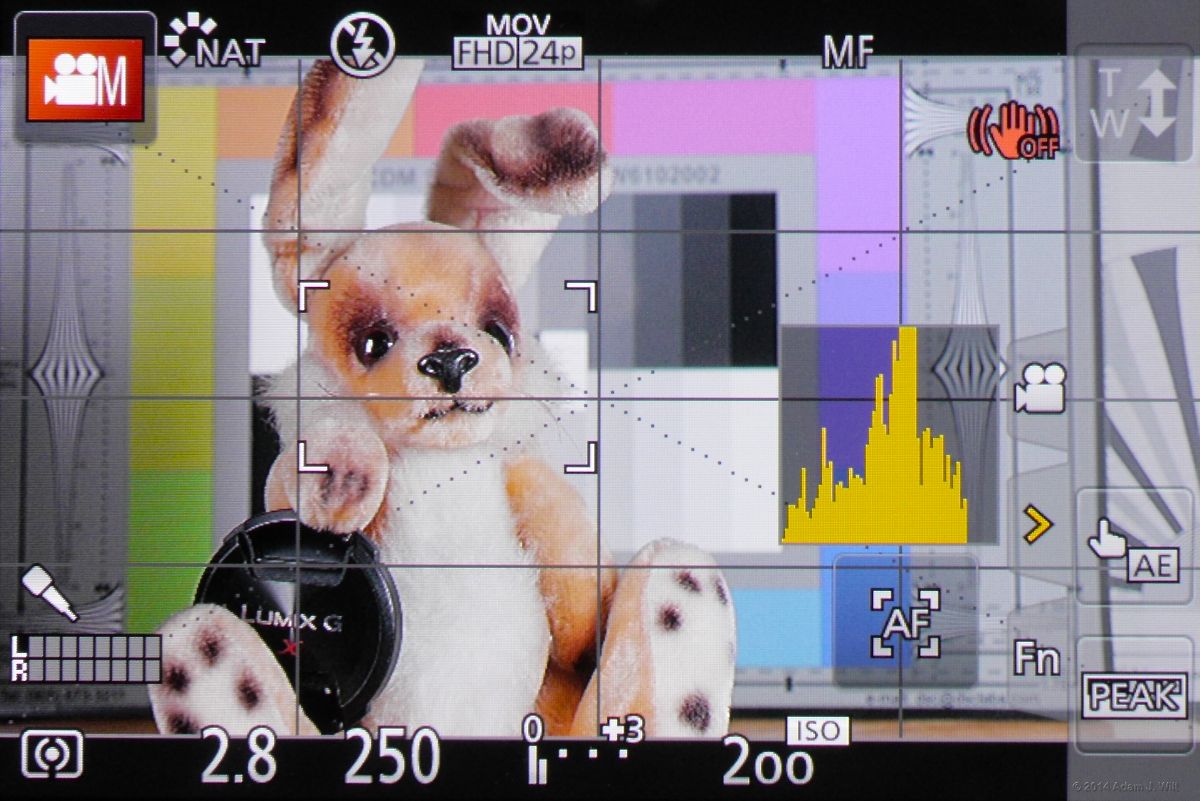
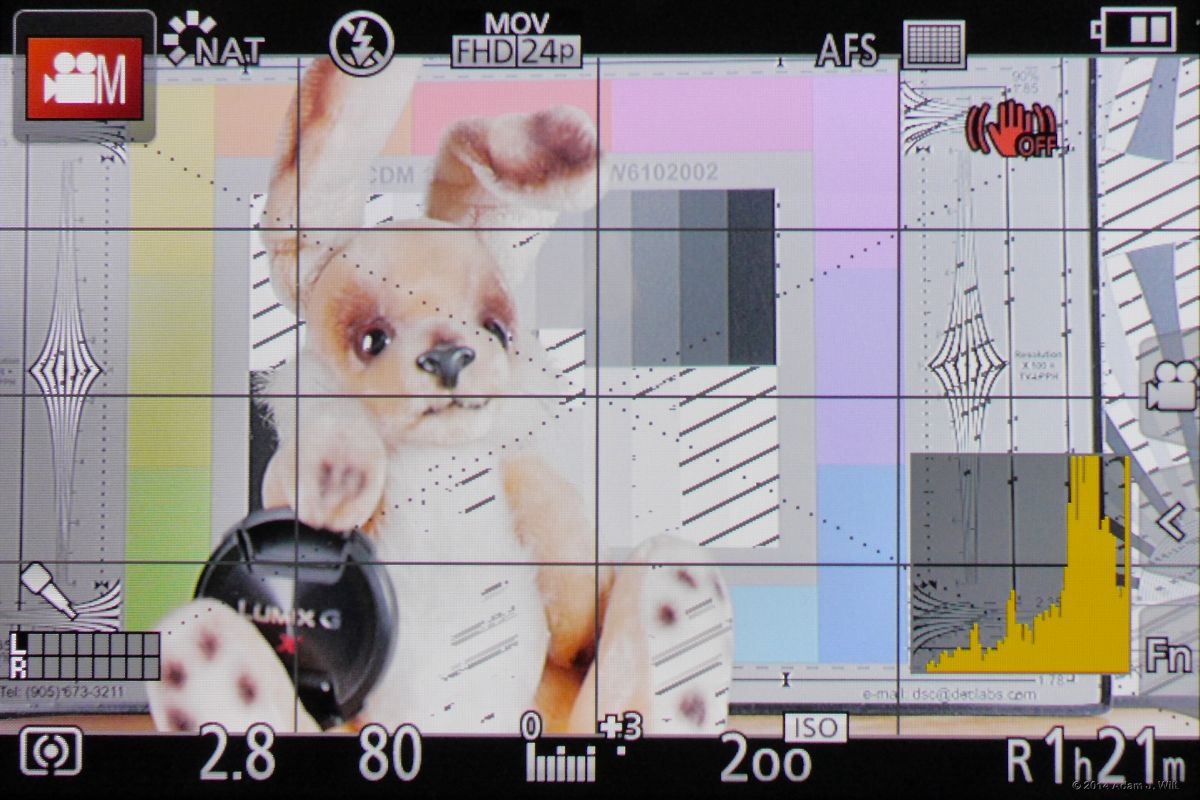
Most data overlays and grid enabled. Not shown: “artificial horizon” shot-leveling indicator; timecode.
Some things of note in the image above:
The histogram can be repositioned simply by touching and dragging. Normally I have it in the lower-right corner, but here it’s moved itself out of the way of the autofocus button and the right-side slide-out touch-tab menu of handy shortcuts (only two of which are shown; there’s a whole ‘nother row in the “Fn” tab, plus the “silent operation” touch menu indicated by the camera icon).
Even though I have the focus mode set to manual, I can still press the AF touch-target to prefocus my shot (though I can’t do so while recording).
The white-cornered area just left of center is my focus target: that’s where autofocus will concentrate, and there is where focus magnification will occur.
If you don’t touch any controls, data overlays will gradually dim, to about 50% after 30 seconds. After a minute, they’ll vanish altogether. Panasonic does this to prevent burn-in on the OLED screen. Unfortunately there’s no way to override this: I value having the artificial horizon for Steadicam work, and I’d like to be able to keep it visible without having to tap a control during long takes.

Focus peaking, Low.
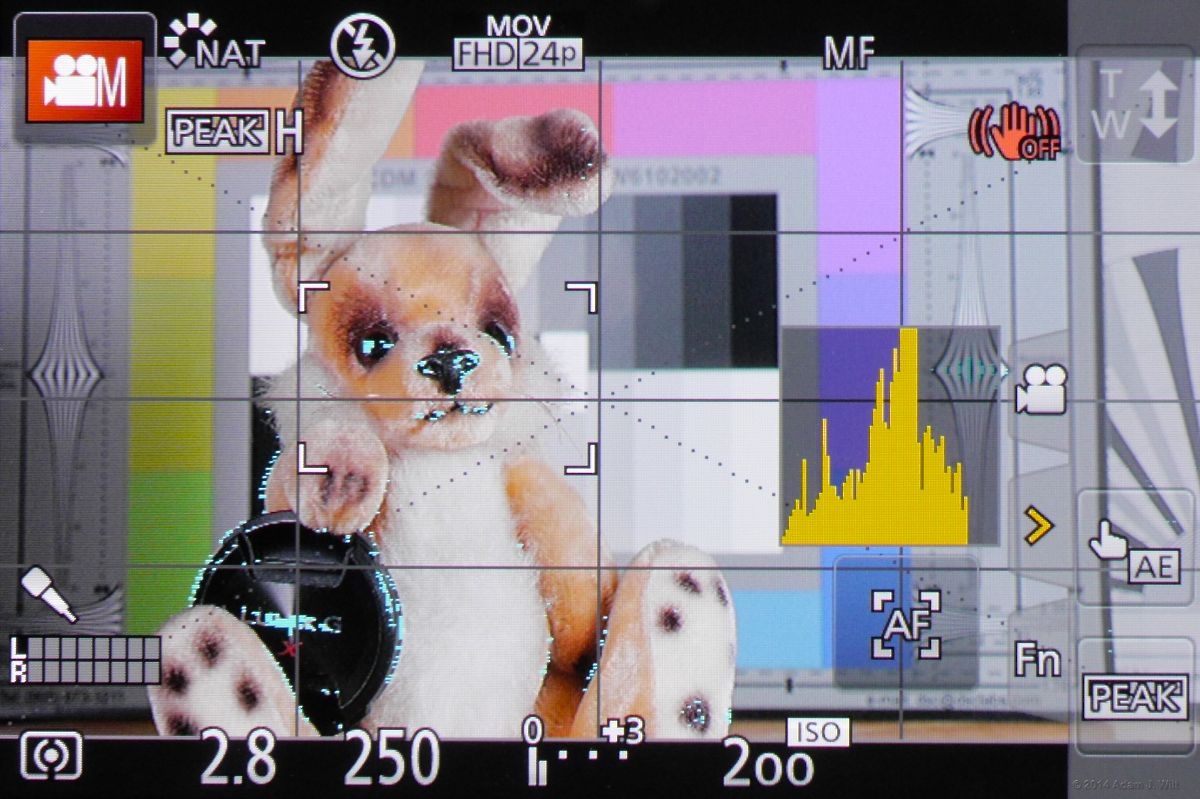
Focus peaking, High.
There are two focus peaking settings; Low and High appear to refer to selectivity rather than sensitivity, as Low picks up more edges than High. I’m surprised at how well peaking works, seeing as neither setting is at all adjustable. I can toggle between High, Low, and off with an assignable key, or with the touch button shown here. Low can be set to show blue, orange, or white edges, while High displays in cyan, yellow, or green. Focus peaking is hugely helpful, and I miss it when I go back to my GH3.
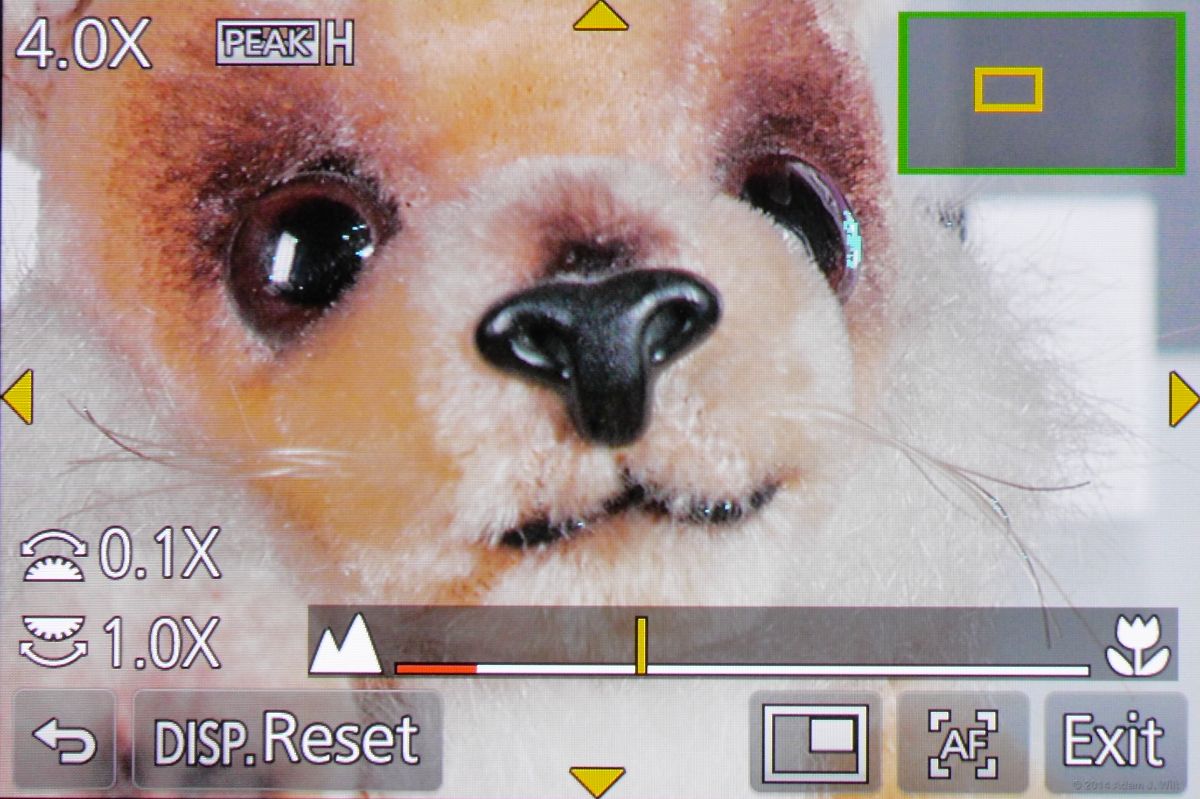
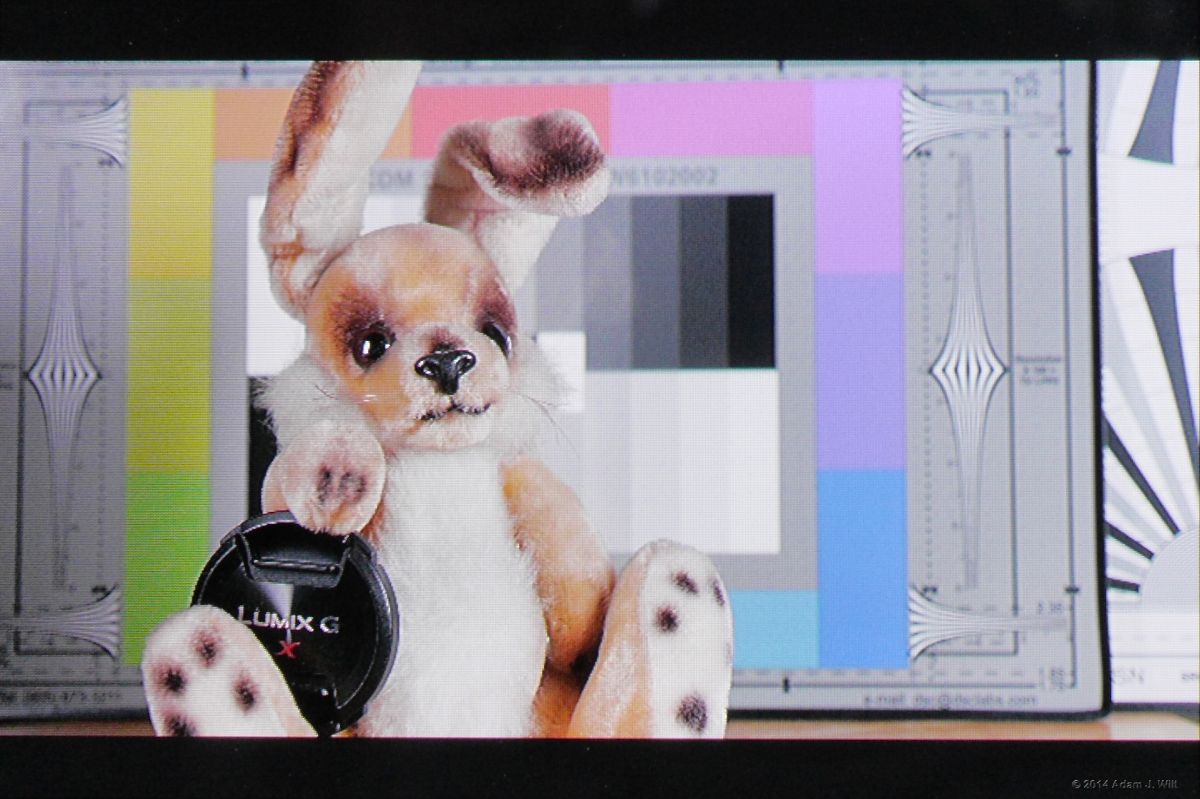
If I zoom in (with an electronically-coupled lens, I can set zoom-in to occur as soon as I turn the focus ring), I get a very crisp magnified view. Live view zooming runs from 3.0x to 10.0x, settable in full steps with the rear wheel, and in tenths with the front wheel. Note the focus peaking on Barney’s left eye.
Focus mag only works while stopped; once you start rolling, you can’t zoom in.
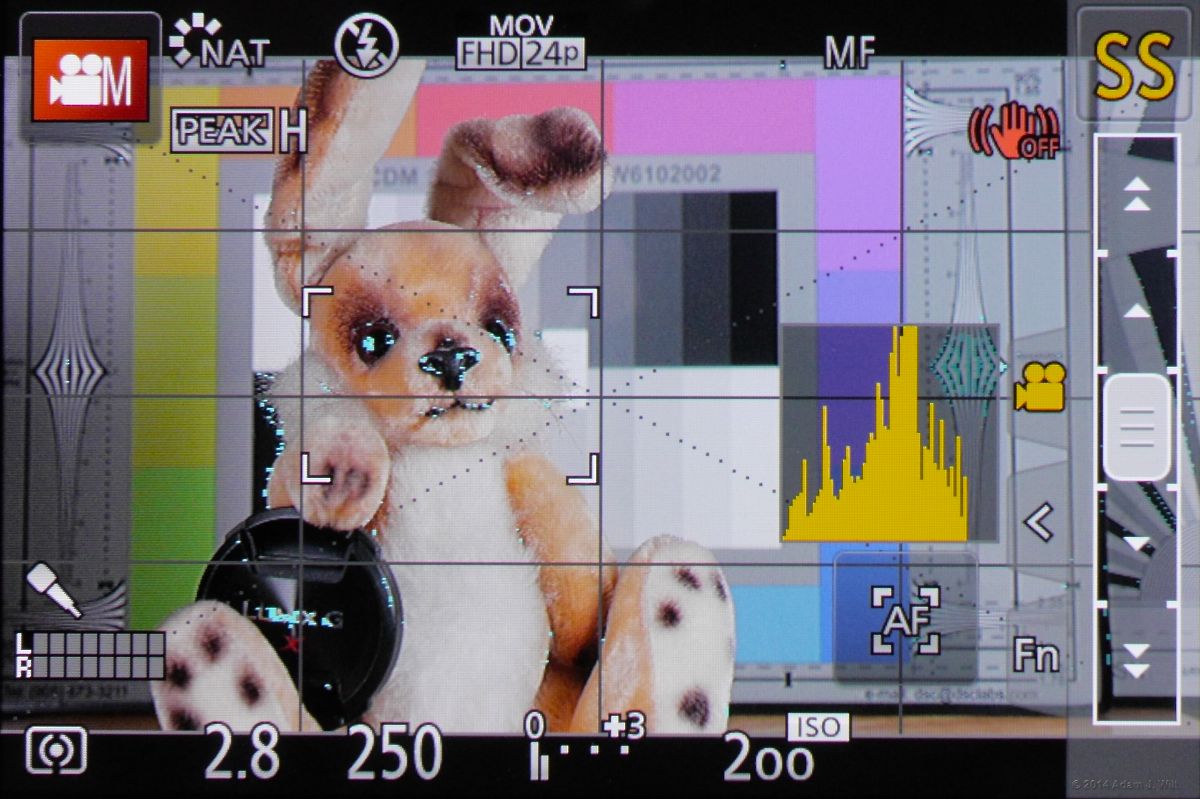
Here’s one of the options in the “silent operation” menu: I can touch the slider to adjust shutter speed. Other options allow setting F-stop, zoom, ISO, and exposure compensation, depending on the lens used and the exposure mode.
The GH4 has two zebra settings, individually settable between 50% and 105% in 5% increments. Only one zebra can be shown at a time, but as with peaking, putting zebra on a Fn key lets you toggle between ’em quickly enough.
There are ten assignable Fn buttons, five on the body and five in the Fn menu on the touchscreen. It’s not nearly enough; I want several more on the body (making the video-record button assignable would be a start). But the body is so small, where would you put them?
Next: Performance, Image Tweaks, and More…