
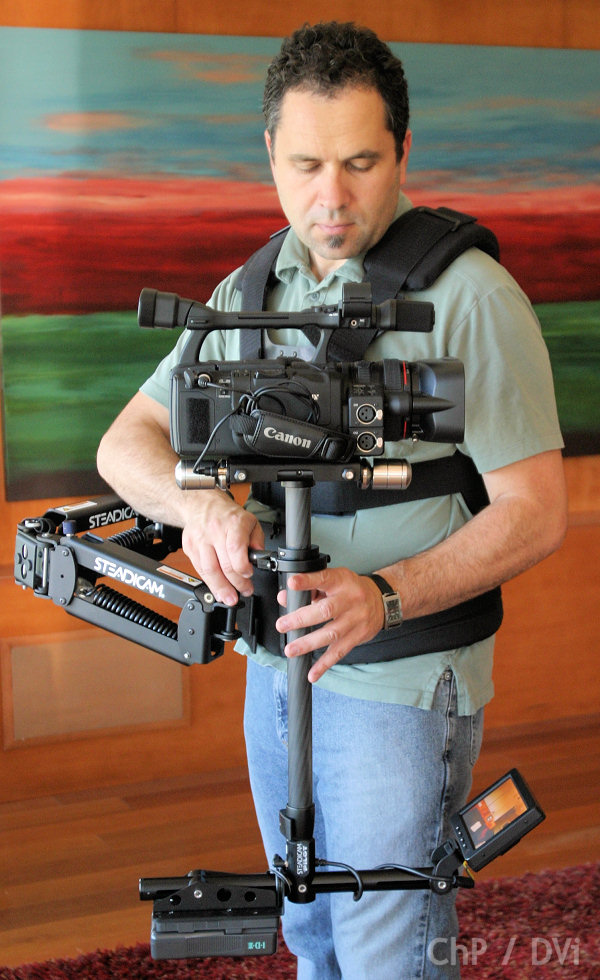
Above: Charles Papert flies the Steadicam Pilot with a Canon XH A1.
I have noticed that certain notions flare up amongst the message boards and quickly become flavors-of-the-month; shallow depth-of-field became no less than an obsession for the small-chip crowd in the past few years and more recently, I see a lot of chatter surrounding the mysterious and elusive pursuit of Dynamic Balance. Some appear to be banking on the hope that a flat spin will magically transform their operating from drunken-sailor-wobblevision to dolly-like perfection; while it is helpful to understand and apply the principles of DB, chances are that said operating issues are more likely due to lack of technique and extensive practice (neither of which should be underestimated). In any event, here’s a great video that demonstrates the fundamentals of dynamic balance (which can also be found on the DVD that accompanies the Pilot):
And if you REALLY want to blow your mind, do a web search for Jerry Holway’s amazing “Dynamic Balance Primer.” I won’t pretend that I understand all of it, since I was, uh, absent that day in school, but since I seem to be able get my own rig to spin flat I’ll just take it as read!
Enough of the esoterica, let’s move on to the rest of the Pilot sled. Power from the batteries is distributed internally to the 12-volt monitor and camera platform, and video is returned down to the monitor via RCA cable. There is a 12-volt jack on the upper stage, and a provided cable sports bare ends for you to attach the connector of your choice to power outboard accessories (wireless mike receiver, for instance). If you have multiple components that require power, it makes the most sense to have them all powered from your onboard battery rather than have four different batteries that can run out at different times, but this may not be that easy as many components (including most cameras) require lower voltages than 12v. One thing to note is that while Anton Bauer and V-mount plates generally have P-tap connectors providing additional 12v service, the ones on the Pilot do not, so adding accessories like hard drives at the base of the sled will require running power back down from the top of the rig, or jacking into the power wires from the battery (at one’s own risk, of course).
 As previously noted, both the battery and the monitor can be individually slid along a horizontal spar that can itself be adjusted fore and aft, giving many options for dynamic balancing. The center post can be telescoped to accommodate heavier cameras and increase tilt inertia, and is keyed to prevent the post from rotating during extension. The gimbal is well balanced and nicely machined and as smooth as one would expect from a Steadicam product; the handle is fairly slender but could easily be wrapped with a foam grip if one was inclined.
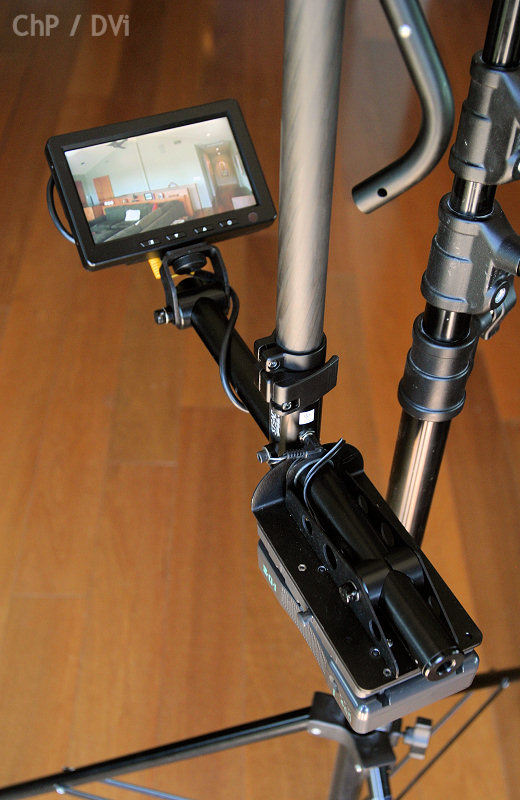
I have not used the Co-Pilot with its 3.5″ monitor, but the 5.8″ 16×9 monitor included with the standard Pilot is quite good. It has multiple image sizes (stretch, zoom etc), horizontal and vertical reverse scan for low mode or 35mm adaptors that invert the image, and anti-reflective coatings for exterior viewing which works pretty well. Some monitors have very restrictive vertical viewing angles which will not allow one to boom through the entire range without having the image “reverse out” but I was able to view a proper image at all times with this display.
With my rig fully balanced and all cables neatly tucked away (dangling cables is a Steadicam no-no), it was time to suit up. The Pilot vest is easy to pack as previously noted and can accommodate a wide range of operators, but beyond that I must say that it was a bit confusing for my taste. Trying to figure out which Velcro strap goes where was hard enough without all of the loose ones sticking to each other right out of the case. I would pull on one strap to tighten it and have the whole thing come off in my hand. Velcro is great stuff but it does wear out with time, so heavy users may find themselves ordering replacement straps down the road. The higher-end vests use a variety of buckles from snowboard boot ratchet-style to clickable Fastex-type with the advantage of quick and easy donning and doffing while maintaining your personal settings; the Pilot vest requires you to cinch yourself up each time, which if you were in a hurry could result in a less-than-perfect fit. This might not be obvious at first but if you ended up in the rig for an extended length of time, such as might be the case while shooting an event, this improper fit would eventually manifest itself and become ever more uncomfortable. Once you are in the vest and properly situated, however, it is comfortable and could even be hidden under clothing if you had to shoot a formal event. There is even a little strap specifically to lock the rig to the body while you are in flying mode so that you have both hands free to gesticulate wildly at your talent, if that is your inclination.
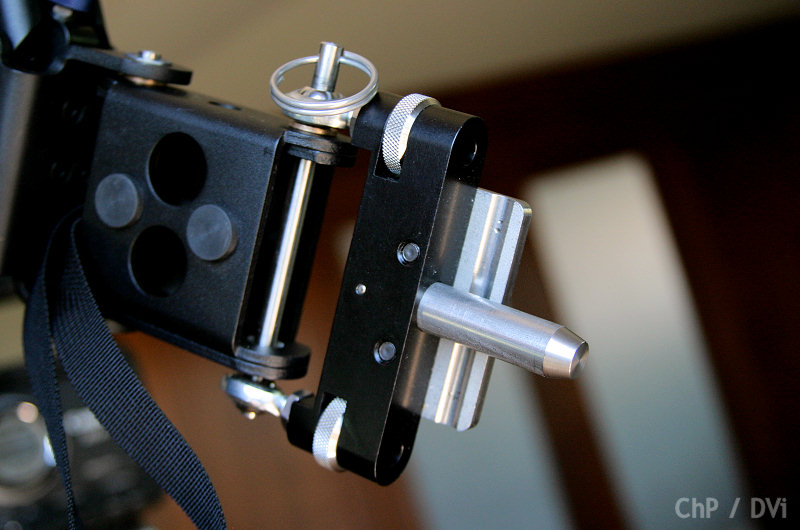
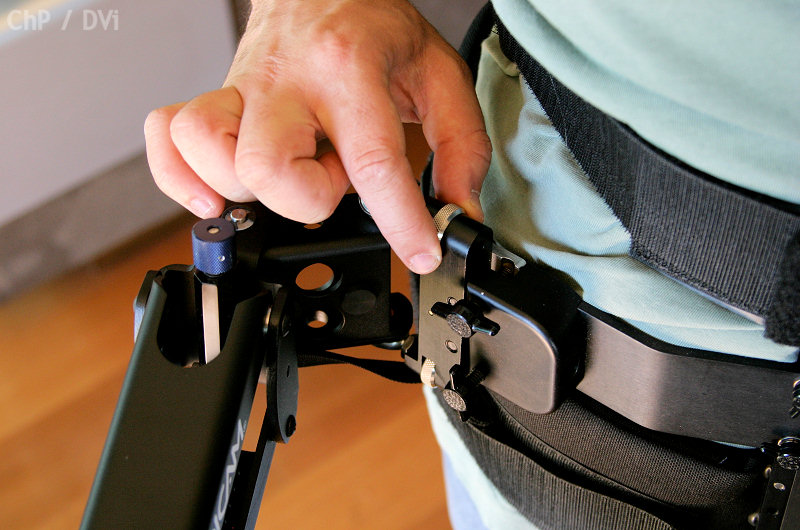 For many years, rigs in this class featured very simple mechanisms that attached the arm to the vest, usually a set of pins that dropped into a socket. While this was quick and easy (and cheap to manufacture), these did not allow the all-important pitch adjustments that are unique to each operator. This critical juncture determines how the rig flies on the body. The ideal is that one stands up straight and the rig simply hovers in place. With many older designs the rig had a tendency to fly away from the body and one had to reign it back with brute force via the gimbal handle, which caused fatigue and invited poor postural habits. Thankfully Tiffen has incorporated a miniaturized version of the two-axis adjustment that has been integrated into the socket of full-size rigs since the very first Steadicam, contributing greatly to the comfort and performance of the Pilot. The socket block can be migrated to other Steadicam vests as desired as it has common holes (although only four while the standard socket has six).
 On to the arm, one of my favorite components of the Pilot. When I saw Garrett’s prototype of what was to become the Flyer arm some 8 years ago, I could not believe that such a simple and lightweight mechanism could work so beautifully. For years the Steadicam arms operated on a “more weight = smoother operation” principle, utilizing multiple springs, pulleys and cables, but here was a single spring arm that carried relatively light payloads with the same elegance as its big brothers. The Pilot continues that tradition with some improvements (since incorporated into the latest version of the Flyer). The goal of a great stabilizer arm is to make the sled feel weightless, to be as invisible as possible to the operator. I have yet to see a competitor’s arm in this weight class function with anything near this transparency; while the Pilot arm has nearly the same feel throughout its range, the typical arm will require ever greater force to raise and lower from its midpoint. This is not only tiring for the operator, it may result in reduced isolation and increased bounce or jitter in the results. If there were one single thing that separates the Pilot from the competition, for my money it would be the arm. I would expect that anyone migrating from another system to this one would likely agree.
With this technology at your service it becomes much more feasible to incorporate subtle and comprehensive booms into your shots. Booming is one of the great weapons of the Steadicam operator and contributes greatly to the 3D-like effect of moving through space. Unlike a jib, it’s pretty effortless to boom quickly and stop on a dime, or continually trim the attitude of the camera (which is easier and less noticeable than tilting). Again, due to the smoothness and linearity of the Pilot arm you can really take advantage of this “luxury.”
 |
 |
|
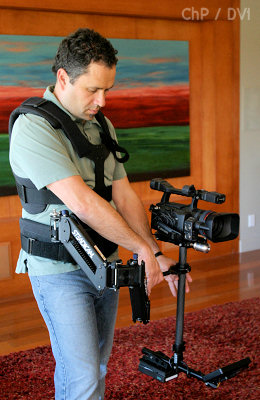
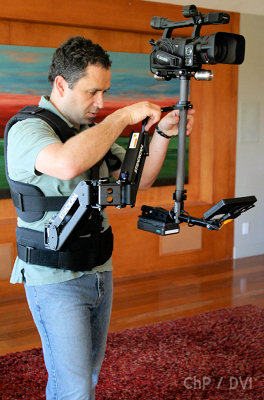
Pilot arm boom range (click photos to see larger versions). |
|
Between this great arm, the refined gimbal and the increased inertia of the sled, flying the Pilot is a joyous experience. It feels solid and elegant, yet nimble. The boom range is exceptional, on a par with much larger rigs and far more usable range than the competition. While it requires a substantially lighter touch than the type of rig I am used to because of its reduced size and weight, it is not nearly as touchy as the Merlin and right out of the box I was able to execute shots that approached the subtlety of my full-size rig (and with some more practice, probably equal those shots). To illustrate this I chose to create a short sequence on my demo Pilot , which can be seen on Page Three of this article. Between designing the shots, executing and reviewing takes, moving furniture around etc. the process of shooting these clips took a couple of hours. During all this I never bothered to dock the rig once, testimony to how much fun it is to fly such a light system that is so capable.
All nitpicks aside, I am thoroughly impressed with the Pilot where it counts: operating performance. For those pondering a purchase of a stabilizer for this weight range I strongly urge you to take a test flight so that you can see for yourself the difference between this and the alternatives. When it comes to camera support (such as stabilizers, tripod/head etc), it is worth investing in a quality product. Many people will own this type of gear for the long run, even as they swap out cameras over time. Remember to give yourself plenty of time to learn the technique of operating; there are no real shortcuts, just lots of solid practice and watching your results carefully to learn what can be improved on next time. Happy flying to all!
Go back to Page One of this article.
Move on to Page Three of this article.